


Since '02 xBhp is different things to different people. From a close knit national community of bikers to India's only motorcycling lifestyle magazine and a place to make like-minded biker friends. Join us

Castrol Power 1

Work on your panic braking skills.

Our Partner

Announcement

Collapse
No announcement yet.

Super Pilot Lamp

Collapse
X
 
  • Filter
  • Time
  • Show
Clear All
new posts

  • Super Pilot Lamp

    This is my 1st thread, Hope you people will like it .
    Super Pilot lamps -
    3W LEDs , running with 800mA constant current regulator . along with Collimator lens .

    Things you need to do it .
    1. 3W LEDs . the best you can find is CREE but they are expensive.One can use local too.
    2.star type Heatsink for the LEDs
    3.Bigger Heatsink To cool the LEDs
    4. Constant Current regulator (variable ones are most welcome) . You can make yourself one or you can buy one online .
    5. Heat conductive paste, or glue
    5.Miscellaneous - some wires , a small plastic box to house the controller ,Heat gun to open the glass from the reflector , soldering iron . etc etc .

    To do this u must have good knowledge about electrical & electronics with good skill of soldering .
    The Bike must be Full DC configured .


    T
    his is the Collimator Lens
    Click image for larger version

Name:	554240_471455372895314_789363732_n.jpg
Views:	1
Size:	60.0 KB
ID:	1975557


    T
    o make this you need to open the Glass from the reflector using heat gun
    Click image for larger version

Name:	546938_471455709561947_1293815686_n.jpg
Views:	1
Size:	65.5 KB
ID:	1975556


    This the stock hole for pilot lamps .
    Click image for larger version

Name:	576908_471456029561915_1918724347_n.jpg
Views:	1
Size:	59.8 KB
ID:	1975559


    After fitting the collimator lens, hold that with hand & check if the LED seats there perfectly or not .
    then use Feviquik to fix that lens in place .
    Click image for larger version

Name:	23900_471456466228538_591301623_n.jpg
Views:	1
Size:	82.3 KB
ID:	1975545


    I have This heatsink lying around my workplace . U should use similar ones .
    Click image for larger version

Name:	560649_471456186228566_1615490571_n.jpg
Views:	1
Size:	78.7 KB
ID:	1975558


    Later I cut that Heatsink like this to properly mount the LEDs
    Click image for larger version

Name:	68383_471456336228551_1120230918_n.jpg
Views:	1
Size:	68.1 KB
ID:	1975548


    Now place the heatsink over the LED to take measurements of where to place the LED on the heatsink & mark that
    Click image for larger version

Name:	63091_471456549561863_895691116_n.jpg
Views:	1
Size:	83.7 KB
ID:	1975547


    Use heat conductive compound or glue to seat the LEDs on the heatsink
    Click image for larger version

Name:	318940_471456656228519_1947921257_n.jpg
Views:	1
Size:	93.9 KB
ID:	1975554


    Now use Feviquik to Fix everything in place, & if you have used Heat glue then no need to put FeviquiK . one can put screws to fix them in place too
    Click image for larger version

Name:	47508_471456739561844_1547439356_n.jpg
Views:	1
Size:	69.8 KB
ID:	1975546


    Now Put whole thing in place Check every thing. & Don't forget to use hot glue to secure everything in place . again one can use bracket or similar if they need to
    Click image for larger version

Name:	230811_471456936228491_1581811698_n.jpg
Views:	1
Size:	95.8 KB
ID:	1975551


    Now Comes the controller part, I Used this controller . It uses L200 . The LEDs are connected in series connection with the output . Never Use any high power LEDs in parallel connection directly. If you have to use them in parallel then use proper resistor in series with the LEDs.
    This Regulator can take as high as 30V as input , so it's very safe to use in automotive application
    Click image for larger version

Name:	396784_433760106664841_1712934168_n.jpg
Views:	1
Size:	51.3 KB
ID:	1975561


    After soldering the circuit in general purpose PCB bord , it looks like this .
    Click image for larger version

Name:	283609_435449173162601_1242775532_n.jpg
Views:	1
Size:	93.2 KB
ID:	1975560


    Now you need some kind box to house the controller. I have some clear acrylic sheet lying around, so i cut them & made this box .
    U can make ur own or buy suitable one
    Click image for larger version

Name:	399383_435449256495926_878840136_n.jpg
Views:	1
Size:	94.7 KB
ID:	1975562


    Now the moment of truth. connect the input of the controller with any 12V battery or wall adapter capable of providing 2A at 12V & check the output .
    Click image for larger version

Name:	222563_471457042895147_1071930312_n.jpg
Views:	1
Size:	60.4 KB
ID:	1975550


    Now place every thing in your bike & test run .
    This is how it looks from the front . This picture is taken with flash, so u can understand how much bright it is .
    Click image for larger version

Name:	306693_471460719561446_471025963_n.jpg
Views:	1
Size:	32.9 KB
ID:	1975552


    Connection of the pilot lamp varies from bike to bike , as they all have different color wires but in RTR , the +ve to be connected to the controller is grey wire & -ve is black wire with white stripe . Or simple the bike's frame .
    Attached Files

  • #2
    DIY Approved


    A very well done and comprehensive DIY. Thanks
    Biking is not about what you have between your legs, its all about how well you use it!!!!!!!

    Give your details here if you want to help your fellow xBhpian stranded in your city

    Touring Blog: Cycling in Mongolia!

    Comment


    • #3
      Awesum DIY. Where did you got all this thing in kolkata especially the LED's & the Lenses?
      And ain't just fixing the LED's alongwith necessary resistors would be enough to make the super pilot lamps.
      I am a noob regarding electronics so please forbive me if I am wrong.

      Comment


      • #4
        where to buy collinator lens, 3W LEDs and heat conductive glue....??
        sigpic

        Tyre Sizes _ Spark Plugs

        Headlight Focus _ Fork Oils

        All India xBhp Couple Riders Thread

        Ashtavinayak + Shirdi
        Purandar
        Raigad
        Dapoli
        Aurangabad
        Kaas Plateu & Thoseghar Waterfalls
        Purandar

        Comment


        • #5
          Good DIY...a 3 watt LED is powerful for a Pilot Lamp..using a 1 watt will suffice,and the larger heatsink can be avoided...the 3 watt version can be tried for the Rear brake light... The Lens is a specialised product which costs about Rs. 250/-...you can suggest some alternative for this...
          When Was The Last Time,You Did Something For The First Time.

          Comment


          • #6
            Originally posted by Abhisek View Post
            Awesum DIY. Where did you got all this thing in kolkata especially the LED's & the Lenses?
            And ain't just fixing the LED's alongwith necessary resistors would be enough to make the super pilot lamps.
            I am a noob regarding electronics so please forbive me if I am wrong.
            Hello abhisek .
            This are high power LEDs . A LED consuming more than 0.75W is known as high power LED . The problem with this LEDs are they generate heat, a good amount of heat . So one must use extra Heatsink . & Using only resistor is a not a good Idea , as the two LEDs in series will require approx 7.2V . where the bike's electrical offers 13.5~14V . So if you use resistor then the resistor will be dropping approx 7V , & will be passing 800Ma , soo it will dissipate approx 7V x 0.8A= ~6W of power . It might not seem much but in electronics it's huge , the resistor will fuse in no time or it will run very very hot . where using the constant current controller dissipates only 0.47W of heat . so much much more efficient .

            & about the LED & lens in kolkata , there is place 'chadni chawk" electronics heaven . u can find every thing there .

            Originally posted by princesirohi View Post
            where to buy collinator lens, 3W LEDs and heat conductive glue....??
            Hello,
            LEDs & lens can be brought online or u can try in local shop . . show them this photo for reference in case they dont understand what u are asking for .
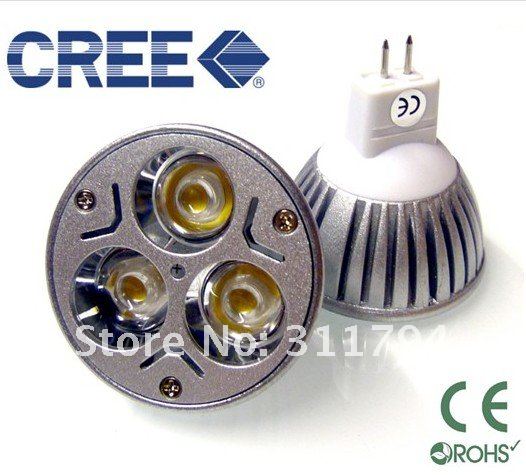
            Originally posted by psr View Post
            Good DIY...a 3 watt LED is powerful for a Pilot Lamp..using a 1 watt will suffice,and the larger heatsink can be avoided...the 3 watt version can be tried for the Rear brake light... The Lens is a specialised product which costs about Rs. 250/-...you can suggest some alternative for this...
            Hello,
            & Thanks for appreciating.
            I have tried 1W LEDs too but they are just not bright enough for me . Here is some pictures of 1W LED setup without the Lens. For 1W LED LM317 & a resistor is just enough .
            Click image for larger version

Name:	413689_435449369829248_1250336977_o.jpg
Views:	1
Size:	97.3 KB
ID:	1841410Click image for larger version

Name:	532510_435449323162586_172363442_n.jpg
Views:	1
Size:	88.7 KB
ID:	1841411


            here in kolkata I get three lens pack for 507/- . They are for home light solution - replacement


            & I used local 3W LEds here(but they are of good quality cost 175/- each)

            & about the rear brake light- white LEDs are readily available . but other color LEDs are very very rare & if I do manage to find them , they cost twice as the white ones but having the exact same quality .

            Originally posted by The Monk View Post
            DIY Approved


            A very well done and comprehensive DIY. Thanks
            thanks for quick approval sir .
            Last edited by The Monk; 03-13-2013, 06:59 PM. Reason: Back to back posts

            Comment


            • #7
              Here is what I found when looking for lens for LED

              20x 60 Degree LED Lens for 1 3 5W LED Black Holder 23DT | eBay
              When Was The Last Time,You Did Something For The First Time.

              Comment


              • #8
                Originally posted by psr View Post
                Here is what I found when looking for lens for LED

                20x 60 Degree LED Lens for 1 3 5W LED Black Holder 23DT | eBay
                That's the right thing, a bit costly . take a look at here .


                Never brought any thing from this site so cant tell it's safe or not, but the price is significantly low .

                Comment


                • #9
                  Can someone tell me how much it will cost on the whole to do this.?

                  Comment


                  • #10
                    nice mod. looks awesome.

                    little update: you don't need 0.1-ohms 5W resistor. that 0.1ohm resistor disipate only very little power (0.1W) so you can use regular 0.5W or0.25W resistor and it will save space and money.

                    Comment


                    • #11
                      Originally posted by adityajohanan View Post
                      Can someone tell me how much it will cost on the whole to do this.?
                      Hello ,
                      If you planing to do it with all Good products then it will cost you approximately 900/- for the pair of CREE LEDs only . & the regulator I posted will cost approximately 230/- . Then the Lens are approx 200/- for a pair .
                      Cree LEds produce 170lumen each , where local or national semiconductor's LEDs produce 97lumen but they cost 175 each .

                      Originally posted by pavithra1984 View Post
                      nice mod. looks awesome.

                      little update: you don't need 0.1-ohms 5W resistor. that 0.1ohm resistor disipate only very little power (0.1W) so you can use regular 0.5W or0.25W resistor and it will save space and money.
                      Hello,
                      Thst o.1ohm resistor is for sensing . the op-amp sens the voltage drop across the resistor to regulate the output current . Yes it can be replaced by 1W or 0.5W but it should be wire wound type , as the temperature rises the value of the resistor also changes hence the output current also changes . The carbon resistor hhas the highest temperature coefficient . & one cant find a wire wound resistor in less than 5W spec . thats why i said 0.1ohm- 5W .
                      Last edited by The Monk; 03-18-2013, 12:16 PM. Reason: Back to back posts

                      Comment


                      • #12
                        here is a simple constant current source for 700 ma current...

                        When Was The Last Time,You Did Something For The First Time.

                        Comment


                        • #13
                          Re: Super Pilot Lamp

                          Originally posted by psr View Post
                          here is a simple constant current source for 700 ma current...
                          Is it for 14V input, if yes what is the output voltage

                          Comment


                          • #14
                            Re: Super Pilot Lamp

                            I want to use a 10watt LED for my bike , please give me what are the changes should I do on this circuit ??
                            The LED I have "PA69-10FWL-N00N" which produces 1180 lm in 540 mAmps in 17-19v ..

                            Can I use 12v and 750mAmp supply ??
                            shubham.bairy facebook
                            My travel book
                            http://www.xbhp.com/talkies/search.php?searchid=843553
                            The Under Dogs (T.U.D)
                            https://www.facebook.com/groups/807767902568039/

                            Comment

                            Working...
                            X
