


 Tweet
Tweet
Hello,
I have been going through many threads & found many members having a tough time to post multiple pix between the text. Just thought of taking an initiative to show a step by step procedure on how a pic can be posted within the text content which are uploaded on other sites.
Upload pix on other sites which offer uploading of images.
Few are : Picasa (which i personally prefer, since its of google & is normally un-blocked in most of the work places. For this need to have a GMAIL account), photobucket.com, tinypic.com, imageshack.us)
Here i will be explaining using Googles Picasa, go to the direct link of picasa (http://picasaweb.google.com/home) or if you in Gmail, checking mails click on Photos on the top.)
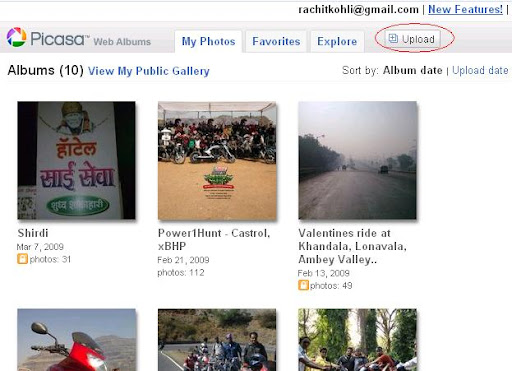
1. Click Upload to put your images online
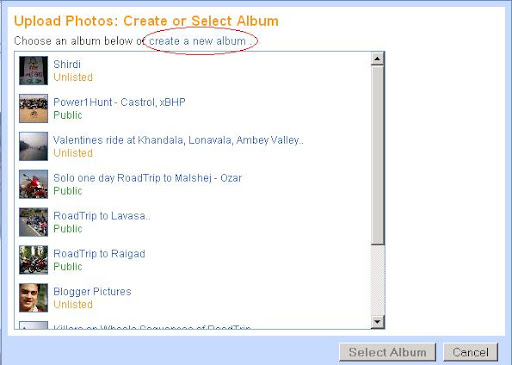
2. This will open up a window which will show the list of existing albums if any & Click "Select Album". Else you can create a new album. This will be a kind of folder to classify the images within.
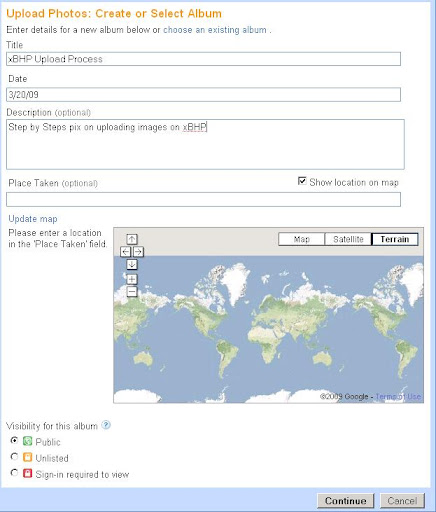
3. Create Album window will now show up like this, type the descriptions if you wish & then click "Continue"
4. Now the page will show up where you can upload your images from your computer. You can upload as many you want. If you want to upload more than 5 images, upload first five images, Click "Upload" then you can repeat the above process.

5. Once the images are uploaded, it will be shown on the Page online now something like this.

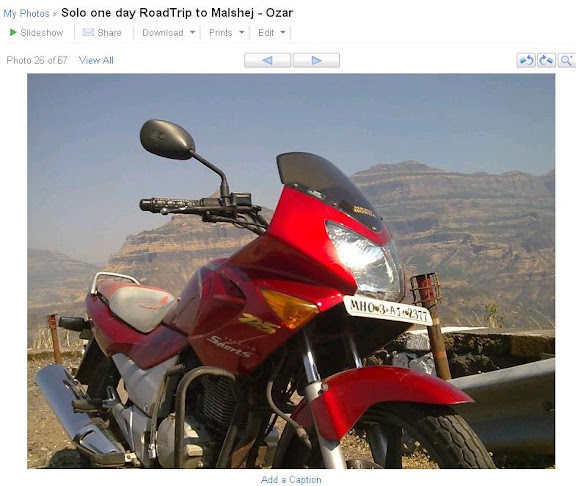
6. Now how to insert this image into your xBHP thread/topic. Click on the image which you want to put in xBHP forum. This will enlarge the image, something like this .
7. Now, we need to copy the path of this image where it is present online.
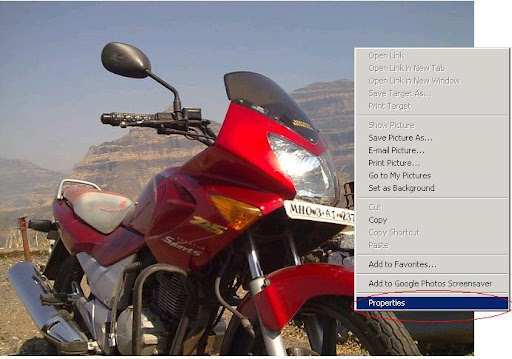
a.) If you are using Internet Explorer, right click on this & click on properties
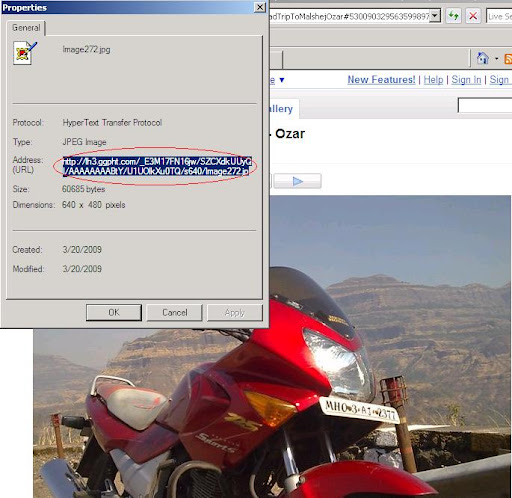
b.) A properties window will come up, need to copy the Address (URL) from this window, which is basically the path.
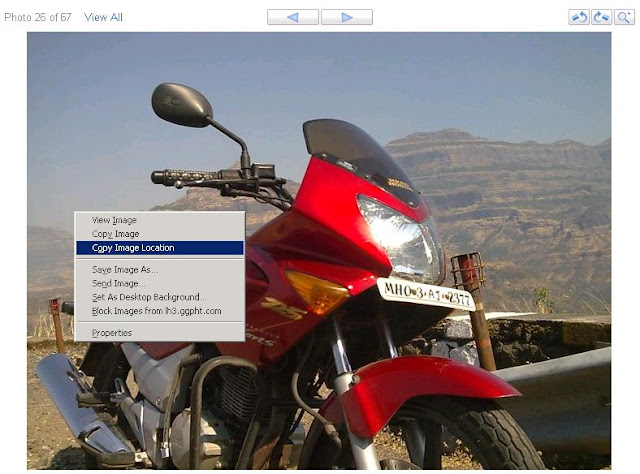
c.) This is for the users using Mozilla Firefox browser. Its simple here, just right click & Click "Copy Image Location"
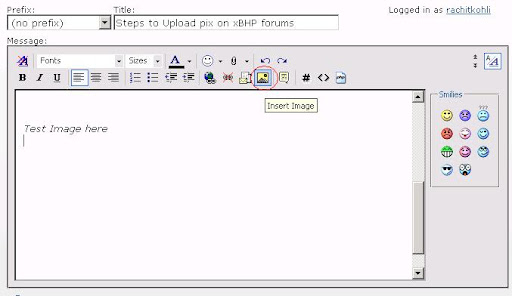
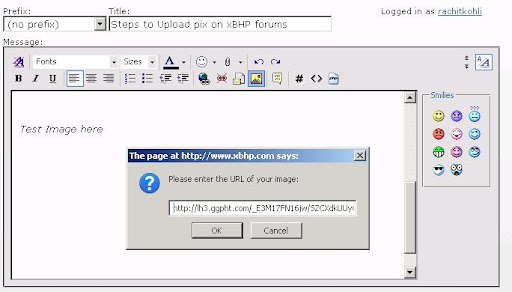
8. Now lets insert this path in the xBHP post. While you are typing the message, lets assume if you want to write something & want the image to display right below that. So type some text & click on "Insert Image" button something like this.
9. A box will show up asking for the online path. Now paste the path which we have copied from earlier steps & click "OK"
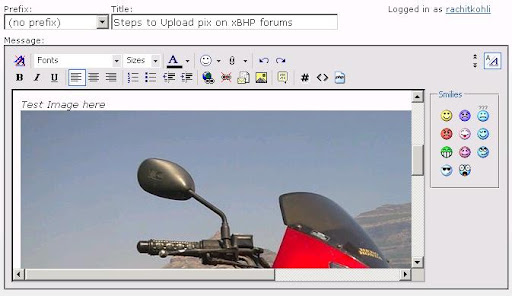
10. Voila.. The image is now right along with your text
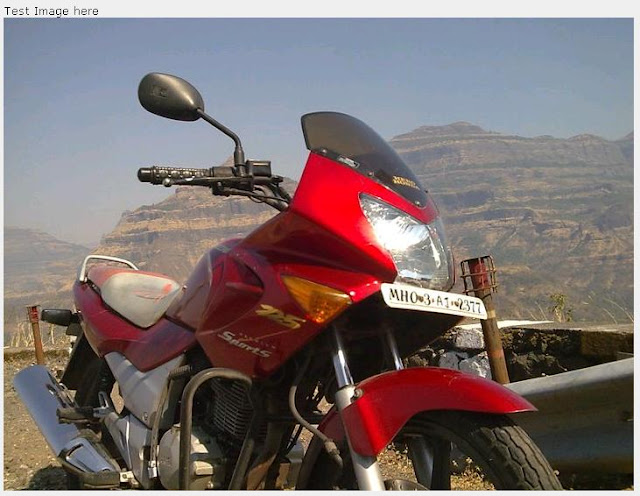
11. Just to ensure before posting if required, click on "Preview Post" button. This will show up how the post is going to be posted & been seen to others.
I think this covers the step by step procedure of how to display the image in between your texts. Though I have only shown the process of how to do using Google's Picasa.
Uploading from other sites is much simpler, Just the benefit of using picasa is, you can archive your images into albums & keep it for future or share with others.
I will also show you how to do the same thing using tinypic.com
On other sites also should be a similar process .
1. On opening the site (TinyPic - Free Image Hosting, Photo Sharing & Video Hosting), you will see an immediate window to upload the image. No login required.
Browse the image from the local computer & click "Upload Now"
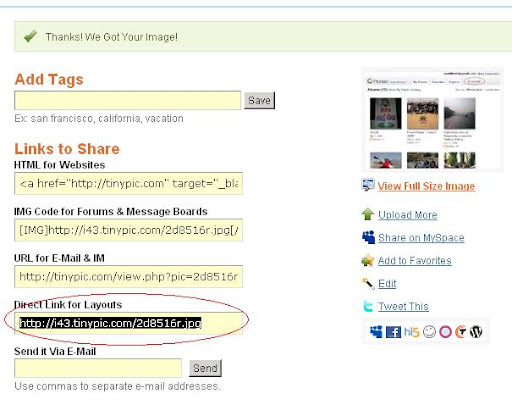
2. On completion of Upload Process following window will show up which has all the information required. Copy the "Direct Link for Layouts" content which consist the path we require & you can put on xBHP from the above process narrated
Hope this tutorial was helpful & should be easy for members who dont have much technical knowledge to upload the images the way they wanted.
-----------------------------------------------------
For New forum toolbar -> Follow this post
I have been going through many threads & found many members having a tough time to post multiple pix between the text. Just thought of taking an initiative to show a step by step procedure on how a pic can be posted within the text content which are uploaded on other sites.
Upload pix on other sites which offer uploading of images.
Few are : Picasa (which i personally prefer, since its of google & is normally un-blocked in most of the work places. For this need to have a GMAIL account), photobucket.com, tinypic.com, imageshack.us)
Here i will be explaining using Googles Picasa, go to the direct link of picasa (http://picasaweb.google.com/home) or if you in Gmail, checking mails click on Photos on the top.)
1. Click Upload to put your images online
2. This will open up a window which will show the list of existing albums if any & Click "Select Album". Else you can create a new album. This will be a kind of folder to classify the images within.
3. Create Album window will now show up like this, type the descriptions if you wish & then click "Continue"
4. Now the page will show up where you can upload your images from your computer. You can upload as many you want. If you want to upload more than 5 images, upload first five images, Click "Upload" then you can repeat the above process.
5. Once the images are uploaded, it will be shown on the Page online now something like this.
6. Now how to insert this image into your xBHP thread/topic. Click on the image which you want to put in xBHP forum. This will enlarge the image, something like this .
7. Now, we need to copy the path of this image where it is present online.
a.) If you are using Internet Explorer, right click on this & click on properties
b.) A properties window will come up, need to copy the Address (URL) from this window, which is basically the path.
c.) This is for the users using Mozilla Firefox browser. Its simple here, just right click & Click "Copy Image Location"
8. Now lets insert this path in the xBHP post. While you are typing the message, lets assume if you want to write something & want the image to display right below that. So type some text & click on "Insert Image" button something like this.
9. A box will show up asking for the online path. Now paste the path which we have copied from earlier steps & click "OK"
10. Voila.. The image is now right along with your text
11. Just to ensure before posting if required, click on "Preview Post" button. This will show up how the post is going to be posted & been seen to others.
I think this covers the step by step procedure of how to display the image in between your texts. Though I have only shown the process of how to do using Google's Picasa.
Uploading from other sites is much simpler, Just the benefit of using picasa is, you can archive your images into albums & keep it for future or share with others.
I will also show you how to do the same thing using tinypic.com
On other sites also should be a similar process .
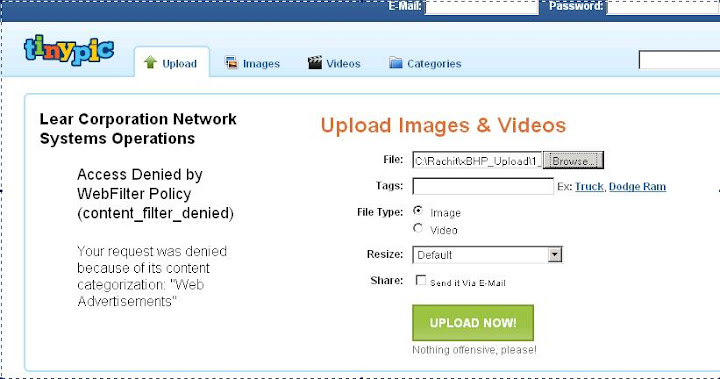
1. On opening the site (TinyPic - Free Image Hosting, Photo Sharing & Video Hosting), you will see an immediate window to upload the image. No login required.
Browse the image from the local computer & click "Upload Now"
2. On completion of Upload Process following window will show up which has all the information required. Copy the "Direct Link for Layouts" content which consist the path we require & you can put on xBHP from the above process narrated
Hope this tutorial was helpful & should be easy for members who dont have much technical knowledge to upload the images the way they wanted.
-----------------------------------------------------
For New forum toolbar -> Follow this post


Comment