






The Hero Karizma has been one of the most favourite bikes for Indian biking enthusiasts for many years. Its launch has been one of the key turning points in the Indian motorcycling market. It gave a taste of true performance motorcycling to Indian bikers at a time when the market was full of commuter class motorcycles. It ruled the hearts and minds of the bikers for almost a decade before slowly fading away.
But people still own it with pride. And this DIY article is for those proud owners only to help them maintain this beauty of a motorcycle. Here, we will learn how to replace the air filter of the Karizma in few simple steps.

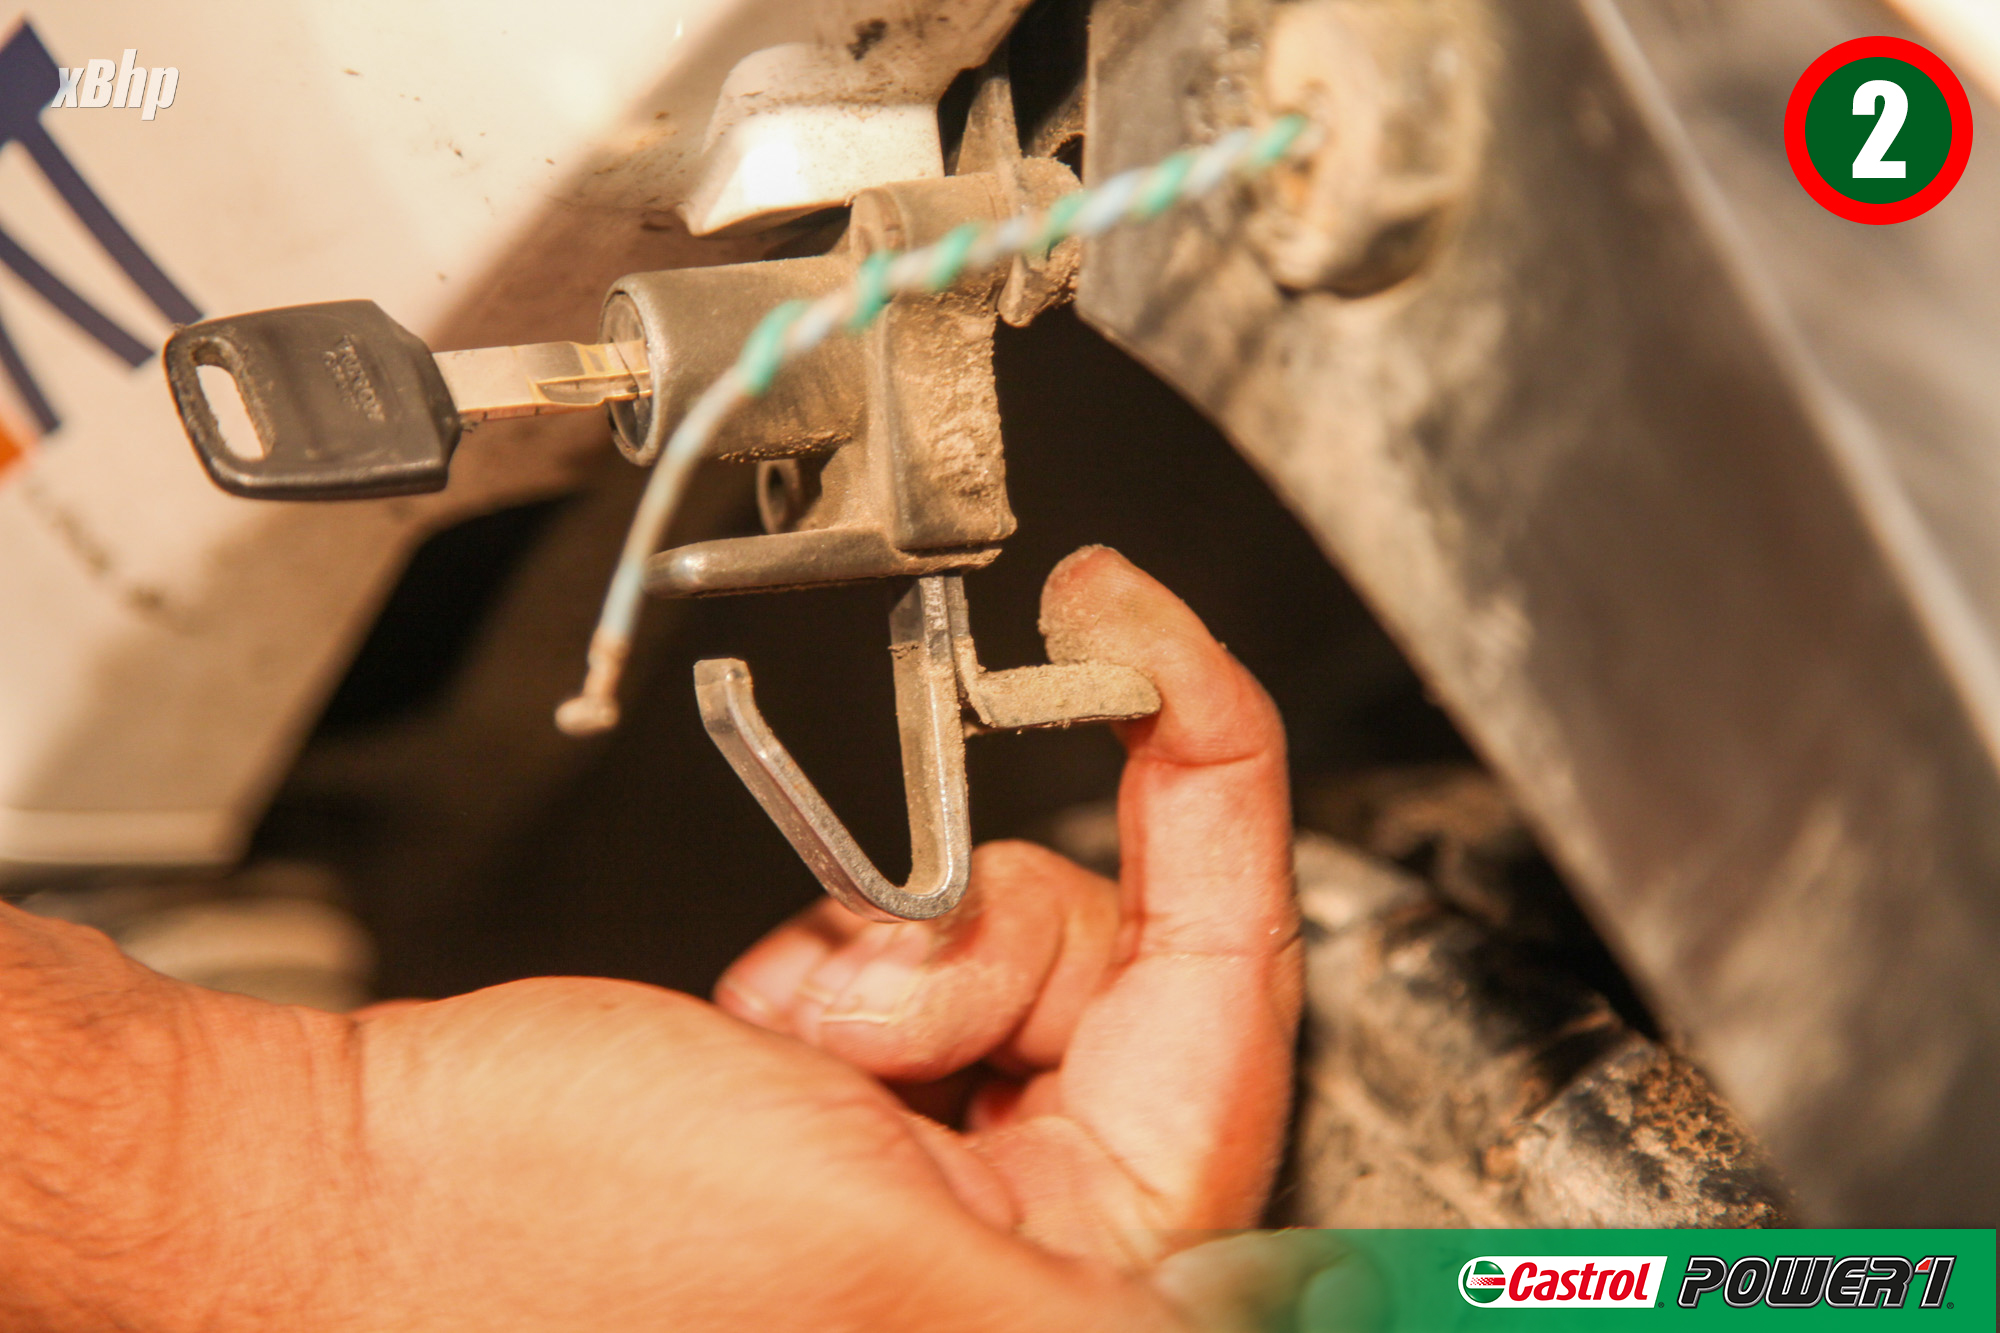

Step 1-3: Remove the seat by unlocking the seat lock and pulling the lever.


Step 4-5: Open the screws on the left side panel with the help of a screwdriver.

Step 6: Gently pull the panel out.

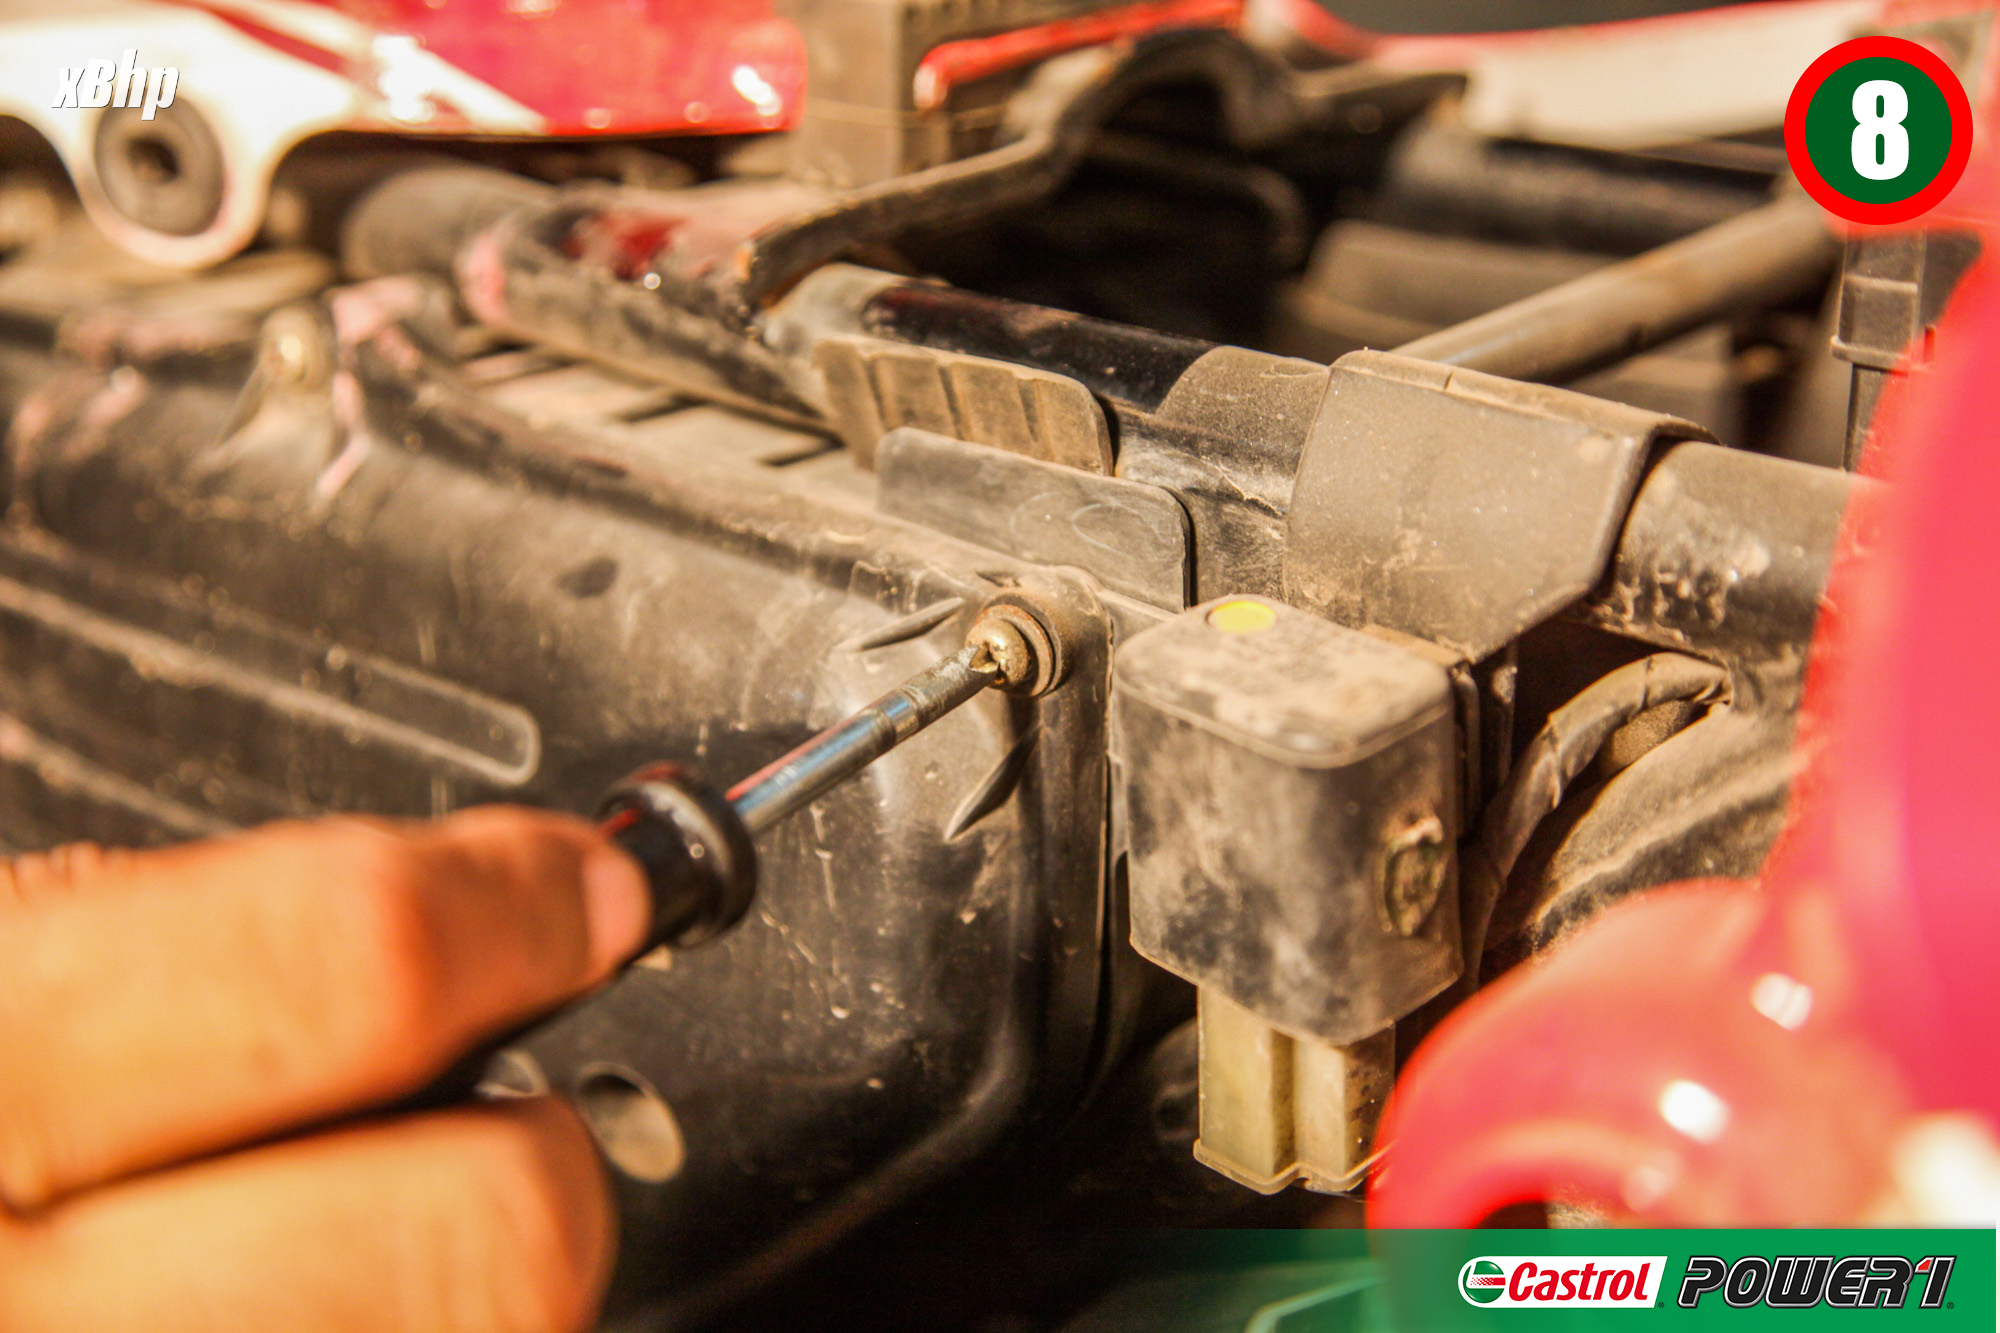
Step 7-8: With the help of a 4-head screwdriver, open the screws marked here with the circle.


Steps 9-10: The yellowish brownish thing that you see in the plastic frame is your air filter.


Step 11-12: Pull the air filter assembly out and clean the box with a piece of a slightly damp cloth.
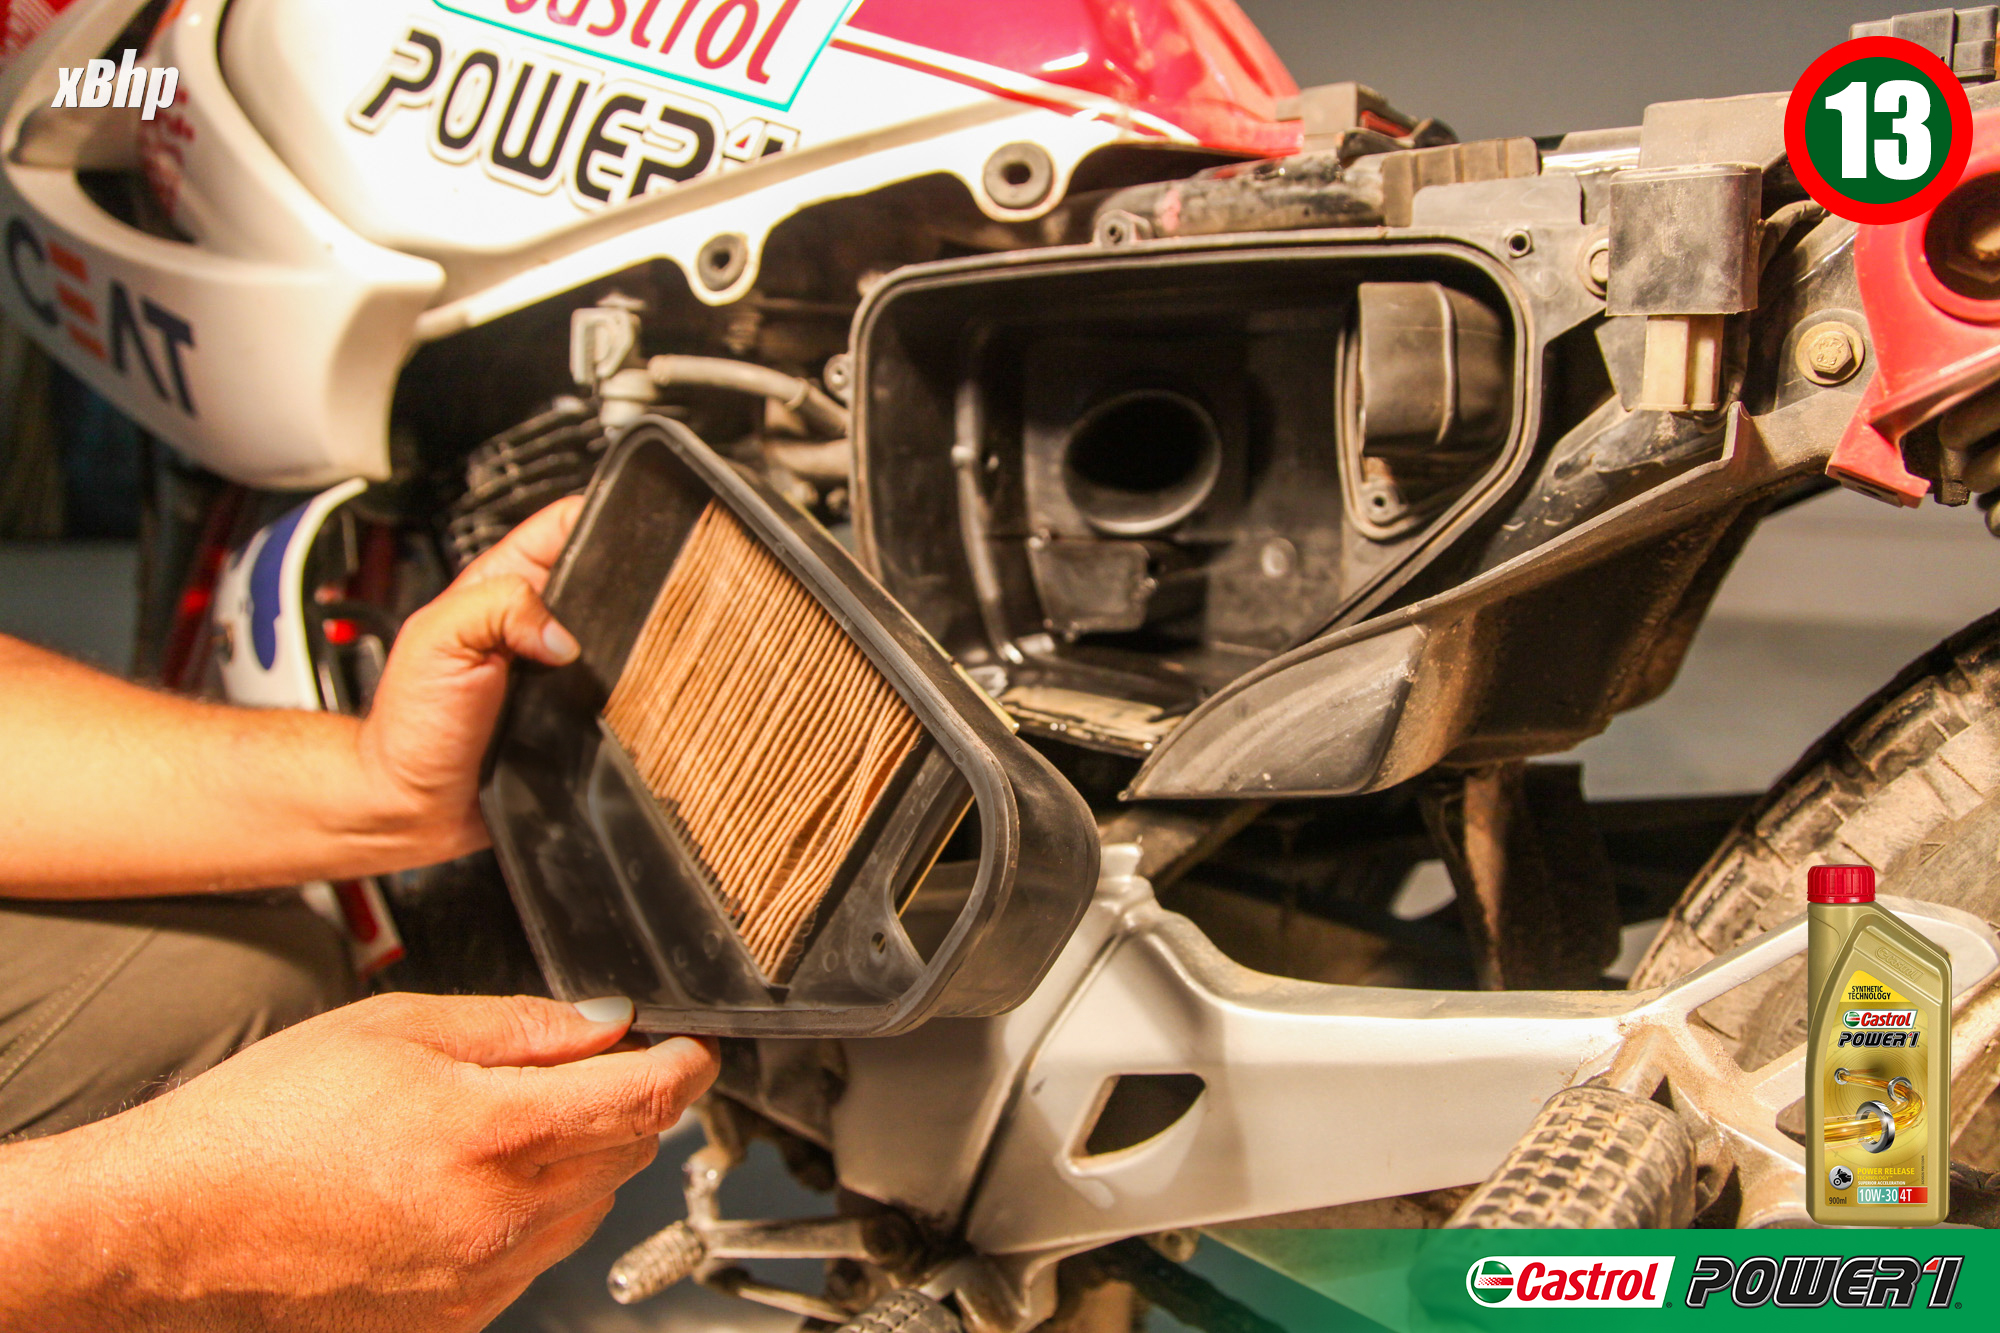
Step 13: Replace the air filter with a new one and put everything back. Don’t forget to fill your engine with Castrol POWER1 10W30 engine oil which is recommended engine oil grade for Hero Karizma.
Caution: Karizma uses a paper filter and you are not supposed to clean it with petrol/kerosene or any other liquid substance. At best, you can clean it by blowing air, but it is recommended that you change the filter completely whenever need be.