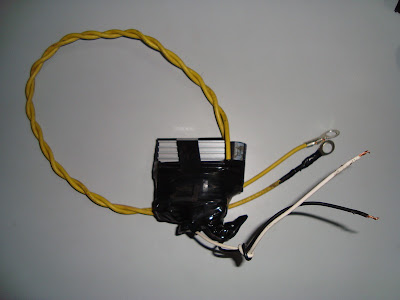
So can anyone help me on how the amplify voltage from 2.1v to 4v?
Announcement
Collapse
No announcement yet.
Converted my Pulsar 150 Classic to ALL DC
Collapse
X
-
Re: Converted my Pulsar 150 Classic to ALL DC
hello guys,
please help me to convert my pulsar 150 ug2 from 35w to 55/60w. I know this is a very old topic and a lot of information is available in threads.
But My head is spinning from all the information overload.I'll be simple in my inquiry.
I need to get avenger 180 coil(dv111005),but it is not available in my city.So can i use avenger 200's coil(jm111002). If yes do i need to change the rotor too?
If i finally get to the coil,will i need a relay to connect to the headlight,What in the world is a relay?
Somebody help me out of this nightmare.DON'T ARGUE WITH AN 6 WHEELER.
Rajdoot 175
Pulsar 150
Yamaha RX 135 -sold
Mahindra rodeo
Yamaha RXZ 4s
Comment
-
Re: Converted my Pulsar 150 Classic to ALL DC
Hi, by the way nice job buddy, but I need help.I own a pulsar 150 2006 model non digi, I did what ever mods possible cosmetically, but while installing the projector I am facing problem, everything is installed correctly but the HID isn't working well, it's sparking /blinking, but when I directly connect the HID to the ballast & then to direct battery it was working correctly, I went to the mechanic but he solved the Problem but but but, he connected everything directly with the battery, morning it was fine but night it just lasted 15min with the hid on & then the whole battery drained. What to do? What wrong, where's the problem problem yaar? Pls help?Four wheels move the body. Two wheels move the soul. Proud owner of PULSAR 150.
Comment
-
Re: Converted my Pulsar 150 Classic to ALL DC
Sir I am not able to see any of the picture you have posted please replyOriginally posted by abhijeet080808 View PostHi guys! My Pulsar 150 now runs on all DC. In stock condition, the headlight, tail lamp and pilot lamp (parking), console lamps runs on AC. Rest of the stuffs - horn, indicators, tachometer, brake lamp, tell tale lamps, fuel meter and the starter motor runs on DC through the battery. I converted all the AC stuffs to run on DC.
Advantages -
1. Nil Flickering at idle - constant brightness of headlight.
2. HID ready - can directly install HID in place of my 60/55W light. No battery draining issues.
The procedure is described below. Can be potentially adapted to any bikes.
Step 1
Prepare the AC to DC rectifier circuit. The circuit diagram is given below.

The above circuit is a standard bridge rectifier circuit. Use only parts mentioned above. Check for correct polarity of the diodes and the capacitors.
Thanks to rahuldevnath for helping me confirm the basic idea and provide the design of the circuit including choosing the exact components needed to build the circuit. He has this rectifier on this UGIII Pulsar 180.
My completed circuit -

Look at the circuit - the extra soldering is done so that it may dissipate some heat from the diodes. I recommend a 5K resistor between the capacitor pins to ensure safe discharge of the capacitor charge when not in use. I will be connecting the resistor shortly.

Make 2 DC wires.
Step 2
Now connect the wires as shown below.
You need to modify the wiring at two places -

At the first place separate the yellow wire from the connector of the RR unit. Now connect the wires from the custom built rectifier as shown below.

Step 3
Connect GND to the RR unit mounting bolt.
Step 4
At the second place, connect the another DC wire to the brown wire shown in the picture below. I used the brown wire at the relay. You can use the brown wire at any available point in the wiring. This brown wire is connected to the battery when the ignition is switched ON.

Step 5
Mount the rectifier as shown.


That's it. Look at my console! The engine is OFF.

Any questions - feel free to ask!
----consecutive posts auto-merged-----
Sir please provide me with the circuit diagramOriginally posted by Shreeni0403 View PostFinal rectifier tested for 20mins and there was no heat in any parts. 13.xx was the charging voltage i was getting. Hope it lasts long without any hitch

Abhijeet test your resistor design and let me know soon where to connect it.
Thank you Rahul & Abhijeet for your support
Comment


Comment