Since '02 xBhp is different things to different people. From a close knit national community of bikers to India's only motorcycling lifestyle magazine and a place to make like-minded biker friends. Join us

Castrol Power 1

Dawn & dusk make slight hard to adjust.

Our Partner

Announcement

Collapse
No announcement yet.

The story so far.. My Honda CBR 250R

Collapse
This is a sticky topic.
X
X
 
  • Filter
  • Time
  • Show
Clear All
new posts

  • Re: The story so far.. My Honda CBR 250R

    CHRISTMAS SPECIAL - GIFTS & GOODIES

    Hi All,

    i am quite ashamed to say that since, the last oil change, i have barely managed to cover a puny 250 kms and that too majority is in city premises which kinda sucks. Hopefully post 1st week of January 2017, things should be looking up on the brighter side and may be i can then squeeze another good long distance ride. My CBR is doing fine no problems have cropped up since, last oil change except may be a simple DIY lubing of clutch and throttle cables and slight adjustment that needs to be taken care of. Besides that i must admit i still haven't been able to take my bike for a proper inspection of front and rear tires to sort out the air leakage issue. May be post 1st week i should be in a better position to resolve these little irritating things for good.

    Anyways, i have little something something to share its Christmas after all so gifts have to come right??:


    BLUETOOTH INTERCOM DEVICE:

    Since, my last long distance ride of 1700 kms, it made one thing very clear: when one is a part of group riding: having rider aids like a bluetooth intercom device really helps when one wants to communicate with another rider besides giving the usual hand signals. This is especially all the more important in the event: where one is fully geared and wishes to attend a call or give out a warning sign to the following riders in case of an emergency. During my last solo ride, one thing i found really irritating was when fully geared up and riding and i receive a phone call, i have to stop, take out my gear, my helmet, my gloves and then take out the phone: by then either the phone has already got disconnected or else the call was not important.

    Then one has to gear up and start riding only to find in a few 100 meters, the phone ringing and thus, the whole cycle of removing gears has to be initiated again. I had done my research on branded Bluetooth intercom devices available in India (in the likes of Sena, Cardo, Nexx etc.) however the pricing of 1 individual unit started anywhere from INR - 10k all the way to 25k which was way beyond my budget. While doing research i came across this website: DealeXtreme - Cool Gadgets at the Right Price - DX Free Shipping Worldwide and found out that there are Chinese replicas of similar bluetooth intercom devices which do provide intercommunication facility with a range of up to 1km/1000 mtrs easily (provided both the riders are in the line-of-sight).

    I zeroed in on one such brand from China called Vnetphone V6 1200m
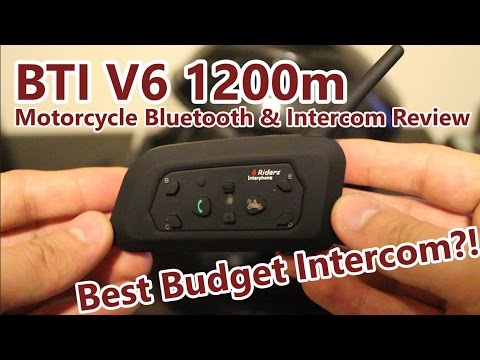


    As the review video above mentions, the quality of voice and inter-communication link is really good. Even when paired to one's smartphone, the overall sound quality is at par with the branded ones. I paid the money and it took almost a month for DealeXtreme - Cool Gadgets at the Right Price - DX Free Shipping Worldwide to deliver the item at my doorstep. I decided to go for a set of two units which costed me about 2500 bucks each which is more economical than any of the other branded ones currently available in the Indian market.


    Pic 1, 2, 3 & 4: Vnetphone V6 Bluetooth intercom device bought from DealeXtreme - Cool Gadgets at the Right Price - DX Free Shipping Worldwide

    Though i haven't installed the intercom device onto my helmet yet but so far a random handheld test confirmed that the build quality and overall reception and voice clarity is simply sublime. Lets say even if the device only lasts for about a year and half: still for mere 2500 bucks this product is quite a steal. The in-built mic set up has a noise cancellation feature which is really good. Once, i do take the device for field testing, i would be in a better position to give a proper review for the same. But yes definitely a yes for those riders who want a cheap, alternative bluetooth intercom device for one on one group riding sessions. The rated battery back up is about 8-9 hours which is more than enough.

    This device can be easily mounted onto any helmet with removable liners and the speakers are velcro sticky mounted which can be removed if required. All in all a good and cheap purchase. How reliable? well that my friend only time will tell.


    SHARK S700 OXYD HELMET:

    Well this one was purely an impulsive decision. Just about a week back thanks to hectic schedule, i kept my helmet on top of the roof of a car to put on my gear before riding. But then it just so happened that in between calls, i accidentally managed to topple the helmet and both the clear visor and the locking ratchet on the left hand side broke as the images below will show. I was already having a bad day and in a fit of rage i decided to simply dump this helmet and get on with procuring a new one.


    Pic 5 & 6: The MT helmet locking ratchet and the visor broke after a fall from the roof of the car.

    So once i reached office, took sometime off and went online to select a good helmet from www.highnoteperformance.com As mentioned earlier, i have decided to slowly invest in good gears as in when budget permits. Incidentally, Highnote Performance had put up a Christmas Special discount sale so managed to zero in on Shark S700 OXYD Helmet from their side and wired money into their given account. For those who may be interested to know more about Shark helmets, do check out their website: SHARK HELMETS, bike helmets, motorcycle and scooter


    Pic 7: Shark S700 OXYD Helmet ordered from http://highnoteperformance.com/


    As experienced earlier, Highnote Performance was very prompt in acknowledging my order and quickly shipped the helmet from their shop and gave the requisite updates from their end which is very commendable. So far i have had a good experience with this site and can recommend riders who have been bitten by a similar bug to get good riding gears. While this was going on once i calmed down, i then also dropped in a mail to http://spartanprogear.com/ just to check if they do keep a stock of the broken ratchet and a clear visor. Spartan too replied promptly and directed me to the links for the respective products. Well Well.. this is what happens when one doesn't think it through properly and just decides to take impulsive decisions.. Regardless, I placed an order for them as well. So customer service seems to have improved tremendously with Spartan.

    Even though Shark Helmet purchase was a quickie (and a financial bomb on my bank balance!! ) nonetheless, i now will have two functional helmets with me may be one for street riding and one for long rides.


    I am now eagerly awaiting for the respective units to arrive so that testing can commence for both the helmet and the Bluetooth intercom device.


    Until then....


    Cheers,
    Last edited by shv18; 12-27-2016, 09:45 AM.
    A quote by a toilet, " use me well, keep me clean, i would never tell anybody whatever i have seen.." :P

    Comment


    • Re: The story so far.. My Honda CBR 250R

      Happy new year Gentlemen. Have a wealthy and safe new year.

      Comment


      • Re: The story so far.. My Honda CBR 250R

        @ Shv18 ...a word of caution on selection of Helmets.. Never buy a Plastic/ABS /Poly carbonate made helmets as they do not give good head protection under accident condition...The impact is likely to break the outer shell and cause head injuries. Choose either a Fiber Glass shell or if you can afford , a Carbon Fiber shell Helmet for better protection.
        Last edited by psr; 02-01-2017, 09:59 AM.
        When Was The Last Time,You Did Something For The First Time.

        Comment


        • Re: The story so far.. My Honda CBR 250R

          Hi All,

          It has been a while since, i had last got the throttle and clutch cables inspected for adjustment and for signs of any wear and tear. So an appointment was taken and the mechanic started taking off the respective cables. On further inspection, it was found that the clutch cable was in a bad shape. I was surprised by the fact that merely under 13,800 kms, the condition of clutch cable was found to be this bad. I am not sure if this is normal and whether other CBR owners have faced similar nature of wear and tear or possibly due to high amount of exposure to rains and mud, the life of the clutch cable is expected to go down drastically.

          Whatever the reason may be, the fact was i had no choice but to replace the clutch cable. As expected, the service center didn't have OEM CBR 250R clutch cable in stock. Hence, for the time being Honda CBR 150R clutch cable was used as an alternate option. When both the clutch cables were inspected, Honda CBR 250R and 150R were found to be more or less of equal length. Rubber grommets from the scrap of the SVC was picked up to be re-used on the new cable. Even though an alternate jugaad clucth cable was used personally, i was not satisfied with such a method. So the SVC guys were told to pull up their socks and place an order for 2 set of OEM CBR 250R clutch cables: 1 to be installed on the bike and one to be kept as spare with me.


          Pic 1 & 2: Condition of clutch cable at 13,800 kms. Note worn out strings from the cable. New clutch cable installed. Since, OEM cable was not in stock, Honda CBR 150R clutch cable was used as an alternative. Note the new rubber grommets (used ones) mounted on the clutch cable to protect it from weather.

          Post installation of the clutch cable, the mechanic then moved onto removing and inspecting the throttle cables A & B. Offlately, i had noticed that the freeplay on my CBR's throttle was too much and very easy or rather slackening quite a bit. Upon dismantling and closely checking out the end point, both the throttle cables were found to be in good health. The mechanic then started the process of lubricating the respective throttle cables.


          Pic 3: Mechanic lubricating the throttle cables A & B. Both were found to be in good shape.

          While putting back the throttle cables, the mechanic pointed out something which i had earlier not noticed: my CBR's right hand side clip-on was found to be slightly bent as shown in the image below. As per him this was the reason he felt why he was able to take out the throttle cables so easily from my bike. Naturally this was also not in stock with the SVC hence, an order was placed for a new one. Approx cost for the RHS clip on was estimated to be somewhere around 900 bucks INR.


          Pic 4: RHS clip-on handlebar was found to be bent. Placed an order for a new one.

          Post completion of the inspection and lubrication work, i left from the SVC and then headed back home. Now it has been a while since, my bluetooth intercom device had landed up and i was still not able to test it out. So, took some time off and started installing the bluetooth intercom system onto my MT Helmet. The installation took about 15 - 20 mins since, this was the first time i was doing it so to get an idea about routing the wires for the speakers took a bit of time to get a hang of. A Sunday ride was coming up so i thought of testing out the system once and for all. Unfortunately, my friend to whom the other bluetooth intercom unit was given, couldn't make it for the ride. So i had no choice but to test out the system on standalone basis.

          I got the system set up with my phone via bluetooth and then went for the ride. Although i am not a big fan of listening to music while riding, purely for the purpose of testing out the set up, i cranked up the music. Surprisingly, the overall sound quality was remarkable and i was able to attend to a few calls and the sound quality was pretty good. The most interesting thing that i discovered was that the intercom system's battery back was really good. I did a total of 230 kms during which i kept on using the intercom system for near about 4 and half hours and the system was found to be performing just fine. I am pretty confident that the advertised back up time of 7 - 8 hours is easily achievable with this intercom system and this can be configured with GPS map application to give instructions to the rider via voice activated route map guidance assistant. For 2500 bucks, this product is a steal!!


          Pic 5 - 11: Vnetphone Bluetooth intercom device getting mounted on MT Helmet.

          My CBR performed flawlessly and there was absolutely no complaint from my end. FE is hovering around 38-39 kmpl which is within the typical territory of a Honda CBR 250R engine. There is no weird noise form the engine bay which reflects that the dreaded cam chain tensioner syndrome has not yet shown its ugly face nor the shims are out of alignment.

          I am planning to do another extensive long distance ride soon hopefully she will work just as fine as she is doing right now. Until then..


          Cheers,


          Originally posted by psr View Post
          @ Shv18 ...a word of caution on selection of Helmets.. Never buy a Plastic/ABS /Poly carbonate made helmets as they do not give good head protection under accident condition...The impact is likely to break the outer shell and cause head injuries. Choose either a Fiber Glass shell or if you can afford , a Carbon Fiber shell Helmet for better protection.
          Sir, as mentioned earlier this helmet was purchased purely out of frustration and in a haphazard manner. My next target is to get hold a carbon fibre/fibre based helmet from either Schuberth, Shoei or Arai. Just a matter of time before finances are sorted out and a friend of mine makes a return trip from Europe. I was surprised to hear that during clearance sale, an Arai helmet with all the bells and whistles is available for ridiculously cheap price in Italy then what is not at all possible in India. No doubt that motorcycling scene is much more developed in Europe and US while we are stuck, taking baby steps here in India.
          Last edited by shv18; 02-01-2017, 01:04 PM.
          A quote by a toilet, " use me well, keep me clean, i would never tell anybody whatever i have seen.." :P

          Comment


          • Re: The story so far.. My Honda CBR 250R

            Shiv, how were the accelerator cables? Did they show any signs of wear?

            Comment


            • Re: The story so far.. My Honda CBR 250R

              Originally posted by leech View Post
              Shiv, how were the accelerator cables? Did they show any signs of wear?
              As mentioned in the post earlier, the throttle cables A & B were found to be in good shape. However, if one may recollect they were replaced a few clicks back (roughly 5 - 6k kms)when the OEMs wore out and broke in one of the trips to Arunachal Pradesh.

              Cheers,
              A quote by a toilet, " use me well, keep me clean, i would never tell anybody whatever i have seen.." :P

              Comment


              • Re: The story so far.. My Honda CBR 250R

                Sorry boss, somehow missed reading that.

                Comment


                • Re: The story so far.. My Honda CBR 250R

                  Originally posted by psr View Post
                  The Earthing problem is a known issue with ZMA and CBR 250 R...but the problem does not come out so blatantly as in @ Shv18's case. There will be intermittent drop in performance, stalling when throttle is closed and clutch pulled in to shift gears, and sudden reluctance of the bike to start both in Cold and Hot conditions.

                  The improvement in better Low to Mid RPM ,and also at higher RPM can be felt, EVEN in bikes Running without a hitch...
                  This happens because the Earth Routing in ZMA /ZMR and in CBR250 is through the Engine Casing.>to Engine Mounting Bolts > to Chassis ...any Oxidation of Aluminum alloy(the Crank Case) will make it a non conductor since aluminum oxide is poor conductor...The bolts which are again coated against corrosion either cadmium or zinc coating also becomes resistive when oxide forms...and of course the chassis itself is made of Iron and Iron rust is a poor conductor.
                  If we have to diagrammatically represent the CBR 250R Electronics circuit here is how it will be.....
                  Sorry for the Crude representation....

                  [ATTACH]189348[/ATTACH]

                  One can see how the Entire Negative return to battery
                  The ECM' s values are sane and operational only if the ECM return path to Battery negative has NO RESISTANCE. We all have seen how the light in our home flickers when the switch for the lights develop loose contact...it is the same happening in the bike. .
                  The Ignition coil is also referenced to the Chassis and a loose contact to battery negative will Decrease the Spark
                  Voltage and Current .
                  So in many ways even a small Loose contact robs the Engines performance in many ways , in a Fuel Injected engine...
                  Providing a Separate Earth Wire from Battery Negative to the Wiring Loom Earth with a Separate 10mm insulated wire will stop all the guessing out of Loose contact problem and provide better repeatable performance from the engine.
                  Hope this is useful...
                  [MENTION=32286]psr[/MENTION] [MENTION=32641]shv18[/MENTION] [MENTION=41586]Divya Sharan[/MENTION] ....Mr.PSR, I admire your technical knowledge and even more admiring your thought to help us. [MENTION=32641]shv18[/MENTION], I don't know how i missed your valuable thread, your way of writing & explaining things is so clear. But Mr.PSR, with due respect i would like to point out one error in the schematic diagram you gave on 03 August 2015, page no.10 of this thread. You explained us providing a separate earth connection from negative terminal of the battery to the wiring loom earth instead of earthing through engine bolts to chassis as done by honda. But in schematic diagram, the positive terminal is connected to wiring loom earth with all other 5 wires. In diagram, i think the battery terminal symbol needs correction, instead of positive it should be negative connected to wiring earth loom, and positive to starter motor. i think it is an negative earthing circuit and what i learnt from your post is correct. If i am right, Kindly make a correction in the circuit. If i misunderstood or wrong, Kindly correct my stupidity.
                  "If you care enough for a result,you will most certainly attain it."

                  Comment


                  • Re: The story so far.. My Honda CBR 250R

                    Hi Fellow riders

                    I have a CBR 250R (Std.) Which is 10 months old.

                    I am having some trouble with the Amber light. It comes on when I am riding beyond 120 KMPH for close to 2 hr. Although my RPMs change every now & thrn, even then this has been happening for the last three long rides...1-while coming back from Jaipur & 2-while going to Narkanda (it started glowing close to Ambala after a continuous riding of about an hr over the speeds of 130kmph. 3-while coming back from Narkanda, after crossing Panipat. When I saw it glowing, I reduced the speed below70 & it blinked 3-4 times & disappeared. I again sped up & crossed 120, it started glowing again so I stopped for about 30 mins & started riding again. It didn't glow or even blinked once even when I crossed 130kmph. I took it to service centre, they checked thoroughly & they said it's nothing.
                    Now I m planning a ride to Tehri, & I am worried. My bike has clocked close to 20000Kms, always serviced at the dealer at the right time & proper maintenance is done. I dunno what to do.

                    Pls advise.

                    DOTHRAS CHEK ...!!!


                    Comment


                    • Re: The story so far.. My Honda CBR 250R

                      Originally posted by fullmoon View Post
                      @psr @shv18 @Divya Sharan ....Mr.PSR, I admire your technical knowledge and even more admiring your thought to help us. @shv18, I don't know how i missed your valuable thread, your way of writing & explaining things is so clear. But Mr.PSR, with due respect i would like to point out one error in the schematic diagram you gave on 03 August 2015, page no.10 of this thread. You explained us providing a separate earth connection from negative terminal of the battery to the wiring loom earth instead of earthing through engine bolts to chassis as done by honda. But in schematic diagram, the positive terminal is connected to wiring loom earth with all other 5 wires. In diagram, i think the battery terminal symbol needs correction, instead of positive it should be negative connected to wiring earth loom, and positive to starter motor. i think it is an negative earthing circuit and what i learnt from your post is correct. If i am right, Kindly make a correction in the circuit. If i misunderstood or wrong, Kindly correct my stupidity.
                      @ Fullmoon , sorry for late reply since I was tied up with some work....(I am a married man)...
                      Thanks for a Good query
                      I think the confusion of you relating the earth wire mod is mainly due to the fact that the Positive battery connection and the Negative connections to the Earth are shown side by side...If you notice I had clearly marked the Battery Positive connections in RED and the earth Return wires as GREEN..I had also posted the picture of Honda Earth wire termination, which again shows the wires to be Green...My guess is you had confused that the RED wires on the Left gets connected to the Green wires shown after a break in circuit on the right..Kindly note I had deliberately spaced the RED wires differently and there are more numbers of connection, compared to the GREEN wires on the right...
                      Kindly read the Description for the RED wire which clearly states, TO ECM, To Turn Indicators ,To Fuel Pump,etc., while for the Green Wire it is mentioned as Earth wire RETURN from LOOM.
                      In any Electrical circuit the positive must have a return to Negative through a load( ie., Lamp,LED,Starter motor,Ignition coil,ECM etc.,) for circuits to function
                      Anyway point is noted and in future ,when posting any circuits ,I will be careful to keep this in mind .
                      Last edited by psr; 02-27-2017, 10:28 AM.
                      When Was The Last Time,You Did Something For The First Time.

                      Comment


                      • Re: The story so far.. My Honda CBR 250R

                        Originally posted by psr View Post
                        @ Fullmoon , sorry for late reply since I was tied up with some work....(I am a married man)...
                        Thanks for a Good query
                        I think the confusion of you relating the earth wire mod is mainly due to the fact that the Positive battery connection and the Negative connections to the Earth are shown side by side...If you notice I had clearly marked the Battery Positive connections in RED and the earth Return wires as GREEN..I had also posted the picture of Honda Earth wire termination, which again shows the wires to be Green...My guess is you had confused that the RED wires on the Left gets connected to the Green wires shown after a break in circuit on the right..Kindly note I had deliberately spaced the RED wires differently and there are more numbers of connection, compared to the GREEN wires on the right...
                        Kindly read the Description for the RED wire which clearly states, TO ECM, To Turn Indicators ,To Fuel Pump,etc., while for the Green Wire it is mentioned as Earth wire RETURN from LOOM.
                        In any Electrical circuit the positive must have a return to Negative through a load( ie., Lamp,LED,Starter motor,Ignition coil,ECM etc.,) for circuits to function
                        Anyway point is noted and in future ,when posting any circuits ,I will be careful to keep this in mind .
                        I got y preowned cbr 250r,and now on a office trip to mumbai. I saw your reply.Mr PSR i stand corrected. Thanks for your detailed reply.I live in outskirt of chennai & works in Greams Road. May I know where you are in chennai? I wish to meet you in person with my CBR.Your guidance for my CBR would be more helpful.Kindly pm me your contact details. me too a married man.
                        Last edited by fullmoon; 02-28-2017, 09:29 AM.
                        "If you care enough for a result,you will most certainly attain it."

                        Comment


                        • Re: The story so far.. My Honda CBR 250R

                          Click image for larger version

Name:	ODO.jpg
Views:	1
Size:	65.8 KB
ID:	1948479Click image for larger version

Name:	Front Rimula R4.jpg
Views:	1
Size:	123.1 KB
ID:	1948480Click image for larger version

Name:	Back Rimula R4.jpg
Views:	1
Size:	124.7 KB
ID:	1948481Click image for larger version

Name:	FZ Oil Filter.jpg
Views:	1
Size:	104.4 KB
ID:	1948482Click image for larger version

Name:	Rimula R4 Oil Level.jpg
Views:	1
Size:	91.7 KB
ID:	1948483Click image for larger version

Name:	Motul Clean & Lube.jpg
Views:	1
Size:	100.5 KB
ID:	1948484Click image for larger version

Name:	Price Clean & Lube Motul.jpg
Views:	1
Size:	99.9 KB
ID:	1948485As this thread is important for CBR 250R owners & to update the Shell Rimula R4 HDEO oil experience in CBR 250R , i intend to update each and every step of my experience here.
                          Thanks to @shiv18 & @psr , Today I decided to show TLC to my preowned CBR 250R (C-ABS) Sword Silver Colour. I bought her on 27522 km on her ODO. Now after Mumbai trip came back to home chennai & my first decision is to start experimenting most of the experiences mentioned in this thread.

                          So,Got Shell Rimula R4 HDEO Engine oil from Shell Fuel Station near Padi, Chennai. I filled my CBR 250R with Rimula R4 HDEO and changed the oil filter with new Yamaha FZ filter (a perfect fit/replacement , thanks to @shiv18,you saved my money - bought 3 of it now 2 are in stock). As you all know CBR 250 R engine oil capacity is 1.5 litre while changing with oil filter it may consume 1.6 to 1.7 litre as you need to pour some amount in oil filter also. Sorry I couldn't post any live pictures because unfortunately my phone battery went dead when mechanic doing all these. Replaced the Air filter with same Honda CBR 250R OE air filter (mine was green in colour - Rs.308/-..damn - @shiv18 - if you could find any economical option for air filter without compromising the quality, we intend to follow the same)

                          Bought a Motul Chain Clean & Motul Chain Lube. To document it I changed the oil at 27544 km on my ODO, and intend to post all parts with its price detail by including pictures of the same. Photos follows....
                          Last edited by fullmoon; 03-06-2017, 01:41 PM. Reason: add info photos added
                          "If you care enough for a result,you will most certainly attain it."

                          Comment


                          • Re: The story so far.. My Honda CBR 250R

                            Hi all,

                            been a while since, some new activity has taken place on this thread and frankly, i quite am taken aback by the fact : now this pokey, irrelevant thread has been made into a permanent fixture: sticky on General Biking Discussion sub category . I am greatly indebted to all the moderators who considered this small experience sharing worthy enough to be turned into a sticky so please do accept my humble gratitude for the same. Anyways, a lot has happened since, the last post so without further adieu let us get on with it..

                            GENERAL MAINTENANCE, PARTS & MORE

                            As mentioned in my last post, on a routine inspection, it was found that the RHS clip on was bent. For a while i kept on scratching my head as to how this could have taken place and why it didn't come into the picture. For about last 4 - 5 weeks, i was experiencing a lot of wrist pain on my right hand but i never bothered to check it. My best guess is due to muscle memory, lot of us become so attuned to riding our bikes that at times we tend to overlook something as minute as this. It was also very disturbing to find the RHS clip on bent as i have never dropped my bike even once and i am extremely cautious when it comes to parking my bike out in the open. Little bit of digging around later revealed the whole scenario. My mother had given out my bike to a family member of mine during my absence for some household work and that gentleman managed to drop my bike while parking in the market. Since, he knew about my OCMD condition, he simply chose to keep mum. Anyways, i guess whatever happened has happened, there is no point in pondering over it! Since, i was planning to go on another 1000 kms ride soon, so an appointment was fixed with the SVC to take care of this issue.

                            As always the mechanic was very prompt in taking my bike to the service bay and started disassembling the RHS clip on and the other attached components in order to remove it. Once the clip - on was removed, one can only assume the amount of force of the impact the clip on had to take to get deformed to such an extent. The mechanic then took out the replacement clip on from the seal pack. The cost of the OEM RHS Clip on was Rs. 745/- so considering this to be a premium sports bike, what i have consistently witnessed is that the parts (cost wise) are pretty reasonable. I have kept a pic of the part no. for easy reference for the readers.


                            Pic: 1, 2, 3 & 4: Mechanic removing the Clip on and the attached components to remove it from the bike. Note the damaged clip on.


                            While the RHS clip on was getting removed, the mechanic also took out the bar weight from the RHS clip. Call me an uneducated layman but all this while i was assuming that the cheap plastic bar end weight caps were all that it took to balance the RHS and LHS clip ons and reduce vibrations and harmonics which naturally occur as one climbs up the RPM range. Once the whole bar weight was removed from the clip on, i was quite surprised by the weight and how it felt in my hands! what can i say.. there is always something new to learn whenever one pays close attention to all the work that goes around your beloved motorcycle . Regardless, once the new clip on was assembled, the weight was inserted back in and the other associated assemblies (front master cylinder, throttle set up etc.) were put back in.


                            Pic 5 & 6: RHS clip on bar end weight getting removed. It felt quite heavy when i held it in my hands.

                            After the assembly of the clip on was completed, i asked the mechanic to ensure that the front and rear brake callipers are properly greased and the chain slack tightened looking at the long distance ride that i was about to take on in a few days. He completed the work rather quickly and gave a go ahead for me to take my bike back home. But of course being an OCMD rider how could i leave my candy land before taking something from the spares section right?? So the clutch pressure plates and a crank case gasket (clutch side) was picked up. Unfortunately the clutch cables still have not arrived at the SVC so that was a bummer. I guess i had no choice but to go ahead with my long ride with CBR 150R clutch cable doing duty.

                            Once, the bills were cleared i then headed back. The difference felt was immediate! Earlier due to the bent RHS clip on the throttle free play was somewhat jammed. But now it was butter smooth and linear to the inputs given by the rider and wrist pain was gone for good so that was a huge relief.


                            Pic 7, 8 & 9: Clutch pressure plates and engine crankcase (clutch side) gasket purchased from the spares section of the SVC.

                            After a few days, I then went ahead with the ride and this time it was an absolute bliss!! Whatever vibrations that were present earlier also vanished. The engine was butter smooth and gear shifts were slick and spot on. My CBR was happily doing what she was born to do: eat miles and miles of roads without tiring one bit! Even with a not so feather weight rider, she was able to accelerate and overtake cars lightning fast and was very responsive throughout. My CBR 250R was able to cruise all day long at good double and triple digit speeds without complaining one bit and was also pushed to 8,000 - 9,500 rpm consistently to check if any engine oil starvation occurs. mind you readers, as per my calculations my CBR has now covered around 14,200 kms on Yamaha FZ/Byson engine oil filter and so far there has been no failure or any problems have cropped on engine's front. We are now inching closer to the 20,000 kms bench mark to assess whether it is possible to run a Honda CBR 250R on a cheap Rs. 40/- alternate engine oil filter. So far the results are extremely encouraging. If my CBR crosses the 20,000 kms mark without any niggles then i guess it is safe to state that this cheap filter works not just for the bike but also for your wallet! plus it will also help those CBR owners who are tormented by the lackadaisical attitude of the SVC due to non-availability of engine oil filters during a service.

                            I am planning to do another 1,000 kms ride hopefully within a week or 10 days which will put the kms run on FZ/Byson engine oil filter to 15,000+ kms. I intend to quickly clock another 2000 - 3000 kms within a month or two, most of which will be on highways and hopefully a chance to say hi to the Himalayas really soon I would also like to give a big shout out to Viaterra for their saddle bag Claw (https://viaterragear.com/shop/luggag...bag-saddlebag/). Without using any bungee cord and only with the supplied straps, i would say this bag is practically a marriage made in heaven for a tourer, especially for CBR owners. Once, strapped onto the bike, the saddle bag simply doesn't move even one bit irrespective of pothole filled roads or high speed triple digit speeds which can be easily achieved by a CBR 250R.


                            Pic 10, 11 & 12: CBR selfie!! On smooth roads the performance was simply sublime.

                            However on bad stretches of road, the front was feeling a little too bouncy and the steering felt slightly heavy when taking turns. I first thought that may be i had put too much air in the front or may be the mechanic by mistake had over-tightened the cone set lock nut. While taking a butt break after covering 271 kms non-stop i decided to check the front tire but from visual inspection the front still had reasonable amount of grooves left and was not at all skittish on the corners. Regardless, the front MRF Revz FC had completed close to 14,000 kms and i had already made up my mind about taking the services of the Michelin Pilot Street Radial tire in the front as well. Once, i reached my destination, after a day's break an appointment was set up with the Michelin dealer.

                            At the time of my arrival, the tire shop dealer didn't had the OEM spec tire with him (110/70-17). Instead he tried to sell 120 spec tires from all different brands he could come up with till i chewed his brain and made it very clear that i will not budge one bit from the OEM specs and will only settle for the Michelin PSRs. He finally relented, made a few calls and got hold of the front tire for me. The tire costed me Rs. 4050/- (inclusive of fitting). Once, the front tire was replaced with Michelin PSRs and i did a side by side comparison with MRF Revz C, it was pretty clear why the front was behaving weird and the steering felt heavy.


                            Pic: 13, 14, 15, 16, 17 & 18: Michelin Pilot Street Radial (110/70 - 17) getting installed on the front. Note the condition of the old MRF Revz C @ 14,000 kms when standing right next to PSR.

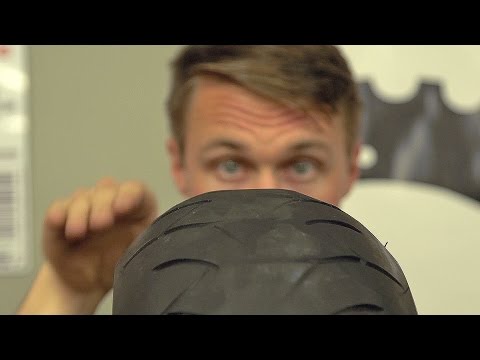
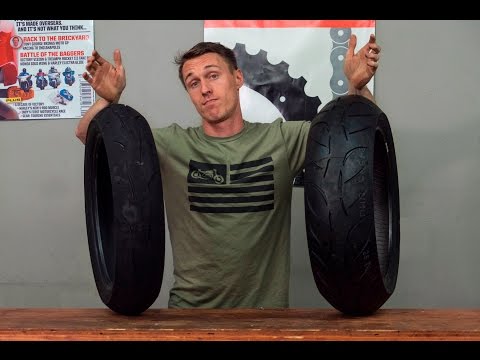
                            The front tire was put back on and the change was immediately apparent. Front felt super light, agile and i was able to flick my bike from to left to right without having to work towards it. For me, it was a long pending thing i wanted to change on my bike and finally it happened and with satisfactory results. Weirdly, a lot many vibes also vanished and my bike was more or less able to take on bad roads rather easily. For the sake of new riders to understand why this heaviness was felt, i would recommend the readers to do check out the following two videos explaining the process of inspecting tires and also why maintaining OEM stock profiles are important when choosing replacement tires for your motorcycle:


                            Tips on tire inspection:


                            Info about tire width and importance:


                            During my 3 - 4 days of stay in the city, one of the days i noticed that the RHS front rear view mirror had become very loose. On further inspection, it was found that the top holding bolt was missing. I am not sure whether allen bolt come off so easily since the lower one was very very tight although i do suspect sabotage/attempt to steal the rear view mirror. If other riders may have experienced similar thing, please do share your views. Anyways, i got hold of the replacement bolt from a spares shop in Honda SVC. Since, it costed just 5 bucks i decided to pick up 4 units: one to be installed onto the bike while the rest 3 remains as a back up stock in my little spares kitty

                            Once, i completed my work in the city i then headed back home. On the return leg of journey, it was a different experience! I never thought that by simply changing the front tire, the overall suspension behaviour would change so drastically!! On the same bad stretches of road where earlier i had to ride extremely slow, on my way back i was able to glide past bumps and potholes without bothering to slow down one bit. Add the beauty of tapered roller steering bearings, no vibes and undue shocks percolated through the handlebar to the rider!! This was something i didn't expect at all so a worthy upgrade!


                            Pic 19 & 20: Allen holding bolt missing from to RHS rear view mirror. Replacement bolt costing just 5 bucks so a cheap replacement.

                            Once, the ride was over i later gave my bike for washing and asked to check the tire pressure and i was in for a surprise. Before the commencement of the journey the rear Michelin had picked up 4 punctures, one due to a nail and rest were micro punctures which were identified to have taken place by minuscule glass shards which over a period of time had made their way through the tire steel belt. They were fixed using the simple tire repair kit found at any tire shop. After the checking tire pressure of front and rear: my front had lost 4 psi whereas the rear had lost about 8 psi. Front i could figure out was most likely due to new tire bead not seating properly with the rim. but the rear tire losing 8 psi was something which is unacceptable. On further research it was clear that all this while my perception of a quick fix approach taken by the local tire shop guys as a permanent solution was completely wrong!

                            Dear readers, always remember that the rubber strip used for fixing a leak in a tubeless tire is just a temporary method to allow the rider to reach home safely or till he/she reaches a proper tire shop for fixing the puncture wound the right way. All this while i was misled by the local tire shop guys that this was the only way a motorcycle tubeless tire is fixed. However the video link below hopefully should break the myths pertaining to the subject matter once and for all..

                            Professional repair technique for tubeless tires:


                            As the video clearly shows that the correct way to repair a puncture is by using mushroom tire repair patch which needs to be installed from the inside of the tire and fixed using proper method. I believe majority of the tire repair shop guys are completely ignorant and i am pretty sure will argue till kingdom come regarding the correct way to repair a puncture in a tubeless tire. Plus almost all of them will not have the mushroom puncture repair patch with them since, the more popular method is just inserting the sticky rubber strip and they end up making quick buck. I had already gone through this ordeal where the tire guy simply refused to acknowledge that the strip repair was a temporary job and he didn't have the mushroom plug/patch since, it was never offered to him by any company (golly! ) after checking with senior rider @AK3D and some research online, i decided to take the matter into my own hands and placed an order for mushroom repair patch from this Indian company for tubeless tires called SARV: http://www.garageequipments.com/tyre...32_33_186.html They accept online payments and will ship it across India.

                            Once, i have the mushroom repair plug/patch in my hands shall visit the same guy and then give him a earful for being such a moron and get the necessary repairs done using right tools and method. Since, most of these tire guys already have experience with cold patch and vulcanising tires and tubes, they will have no problem in doing the patch job from the inside of the tire. Hope this will also help other riders who are also tired by the old patches coming off and the tire leaking again.


                            I believe i have blabbered enough.. post completion of a few rides, i shall share my experience on this thread and mostly technical items shall be covered regarding vehicle, tire and suspension performance etc. Until then..


                            Cheers,

                            Originally posted by zeeshan300975 View Post
                            Hi Fellow riders

                            I have a CBR 250R (Std.) Which is 10 months old.

                            I am having some trouble with the Amber light. It comes on when I am riding beyond 120 KMPH for close to 2 hr. Although my RPMs change every now & thrn, even then this has been happening for the last three long rides...1-while coming back from Jaipur & 2-while going to Narkanda (it started glowing close to Ambala after a continuous riding of about an hr over the speeds of 130kmph. 3-while coming back from Narkanda, after crossing Panipat. When I saw it glowing, I reduced the speed below70 & it blinked 3-4 times & disappeared. I again sped up & crossed 120, it started glowing again so I stopped for about 30 mins & started riding again. It didn't glow or even blinked once even when I crossed 130kmph. I took it to service centre, they checked thoroughly & they said it's nothing.
                            Now I m planning a ride to Tehri, & I am worried. My bike has clocked close to 20000Kms, always serviced at the dealer at the right time & proper maintenance is done. I dunno what to do.

                            Pls advise.

                            DOTHRAS CHEK ...!!!
                            Hi @zeeshan300975

                            not sure why such an issue has cropped up with your bike. If the SVC has got an ECU diagnostic tool then may be they will be able to pinpoint the issue better. Usually when the engine light comes on it means the ECU has detected some anomaly. My educated guess is to either monitor the engine oil level, correct fuel in the tank and also the state of health of the battery. Without seeing the motorcycle in person it is not easy to narrow the possible reasons behind your beloved motorcycle suddenly acting strange. Hope your understand. Good luck.
                            Last edited by shv18; 03-06-2017, 12:57 PM.
                            A quote by a toilet, " use me well, keep me clean, i would never tell anybody whatever i have seen.." :P

                            Comment


                            • Re: The story so far.. My Honda CBR 250R

                              good man, this update reg. importance of using stock tyre sizes & mushroom type patch for tubeless puncture is very much useful. one question, why you opt for radials in front & back? as michelin bias ply is available in stock sizes. I think Radial is for good patch of roads, bad patches can affect the rim(alloy wheels), since radials will transfer the effects to alloys during bad patches. you may clear my confusion.
                              "If you care enough for a result,you will most certainly attain it."

                              Comment


                              • Re: The story so far.. My Honda CBR 250R

                                Originally posted by fullmoon View Post
                                good man, this update reg. importance of using stock tyre sizes & mushroom type patch for tubeless puncture is very much useful. one question, why you opt for radials in front & back? as michelin bias ply is available in stock sizes. I think Radial is for good patch of roads, bad patches can affect the rim(alloy wheels), since radials will transfer the effects to alloys during bad patches. you may clear my confusion.
                                Dear @fullmoon kindly refer to this post on page 7 of this thread: http://www.xbhp.com/talkies/general-...ml#post1159554 and subsequent posts after that. This should give you a perspective of why Michelin PSRs were chosen over a BIAS ply. CBR is capable of doing really good triple digit speeds and cornering ability on BIAS ply is absolutely horrendous. For me corner grip, wet road performance and overall stability of the tire at high speeds was of paramount importance hence Michelin PSRs were chosen and i don't regret that decision one bit. These tires inspire so much confidence that taking a dig while on ghats is an absolute bliss. price wise they are on the expensive side but then you get what you pay for plus i found the bump absorption to be way better than BIAS PLY.

                                hope this answers your query.

                                Cheers,
                                Last edited by shv18; 03-06-2017, 04:44 AM.
                                A quote by a toilet, " use me well, keep me clean, i would never tell anybody whatever i have seen.." :P

                                Comment

                                Working...
                                X