


 Tweet
Tweet
Originally posted by N-o-v-i-c-e
View Post
-
There is a small washer below the short spring which is placed at the top of the needle on the slide. Just for experimenting you can use that washer. I dont think anything will happen if you remove it and it usually fits the needle perfectly. -
Re: The POWERHOUSE Fz18
Hi all,
After a year of delay and disappointments with dates constantly getting pushed month after month.. i am happy to announce that FZ-X is going under the knife on this friday 26th April, 2013. Finally got some relief from work and projects. Now i have all the time on the planet to finish the build ASAP!!
I have requested abhimanyu31 to kindly help me out and take charge of the operation; supervising the whole thing right from start to finish so as to ensure that every stage of the build is checked and double checked again. As far as i have known him abhimanyu31 is very particular and precise when it comes to bikes (common man lemme brag about you for a bit!! ) Thus, with him keeping things on leash all the parts will be put in together precisely as required. The idea is, we do it once and do it right and no more opening up and tinkering of the engine after that. I am confident with rider abhimanyu31's help we would be able to achieve a perfect build. We are giving one whole day to ensure that all calculations are done and after mock build we go to the next stage of assembling..
I would personally like to thank rider Murali, n-o-v-i-c-e, PSRji (for all the pep talks and sharing his wealth of knowledge) and Jonahmano for sharing their experiences regarding their respective builds with RC power up kits.. It will help me in fine tuning the build and the carb tweaking better.. though i would have loved to be the first 'crazy one' to do all the messing around with jetting, fueling etc.. but things always don't go as planned. I guess 1 year delay speaks for itself eh??
Anyways, coming back to the build.. as one may expect.. i will cover the whole build with pics and if possible a timelapse video of the same (if at all time permits) using a GoPro cam, trying to explain what steps were taken to ensure a perfect build takes place, all the DOs and DONTs etc. so that any rider who wishes to follow this path doesn't have to go through problems and troubles like it happened unfortunately with rider jonahmano.
However having said that i would like to state it clearly: All the details and ownership report posted hence forth on this thread pertaining my build are specifically based on my experience. One may choose to try it/follow it/approve it/disregard it but at the end please don't blame me. I am not into marketing of these kits: just purely happy to share my experiences and whatever little i have learnt from all the riders here on xbhp. I hope people don't start hate threads and mud slinging like it has been observed in other threads!
As mentioned earlier, i will be replacing the a lot of stock parts with new ones to ensure better tolerance against bump in power, compression, reducing chances of any of the parts failing due to usage fatigue and ensuring an attempt with the overall build strength to be at its absolute best:
* The whole Valve Assembly: Valves, Valve Springs, rocker Arms, Valve Seats, Valve Nuts and screws, arms, inner camshaft bearing etc.
* New set of clutch plates, bells etc. even though the stock clutch plates are still going strong, i am going to change it keeping in line with the whole idea of a more or less a proper engine rebuild.
* Spark plug, Fuel lines, AIS (to be checked and replaced if necessary) hoses, Air box to be checked and replaced if necessary, all gaskets and seals to be replaced.
* Swing arm bush to be checked and replaced if necessary. A preventive maintenance checking the tires and the alloys with closer inspection for any rim damages, cracks or holes in it.
* Handle assembly to be checked and greased and if anything needs to be replaced shall be replaced. All electricals checked.
* Suspension: front forks/ fork seals and rear suspension, joints to be checked and greased. Basically "Chance pe dance!!" get the whole bike checked and overhauled.
* Crankshaft's health to be checked and replaced if found necessary.
* Any other parts to be replaced if found necessary.
I shall try the RC camshaft first and do a thorough test for 3000 kms and then confirm if the stitching noise as reported by a lot of rider goes away and becomes close to stock camshaft or doesn't with the decompression unit removed and the valve clearances (0.6mm inlet and 0.8mm exhaust) to be maintained (as recommended by Joel). If it doesn't even after a fresh rebuild with all new parts and taking all recommended steps; then we can confirm that the RC cam noise is permanent and Race Concepts will have to look at a better alternative to get rid of it in the future iterations of RC kits for FZ. Post 3000 kms after consulting with abhimanyu31 and Joel i will take a call whether to retain the mild lift cam or revert to stock camshaft like rider Murali.
Based on inputs from other riders; with the 29mm CV carburetor, i will be using the Pulsar 180 Jet kit (117.5 Main Jet, 17.5 Pilot jet and Needle Jet) first to get the base fuel map at sea level conditions. Since, the carburetor is of UCAL make, I will try to source more from the folks at Bajaj spares to give me all the jets of UCAL carbed bikes from the Bajaj's stable in order to tinker around with the fueling.. Murali and Jonahmano both have confirmed that 120 main jet along with the 17.5 pilot jet and needle jet from the pulsar 180 jet kit works the best with this set up. However, i would be in a better position to comment on it post the run-in period. After the first 1000 kms with this set up, i am planning to take her out on a 450+ kms trip keeping in mind within the restrictions of the extended run-in period as mentioned on the first page of this thread and shall report back my observations. Hopefully i should be able to cover 1000 kms quickly within a weeks time right after the completion of the build.
For me this time it will be walking the path of hot roding after all preps, talks, chats, extensive reading, sharing and learning from everyone.. So wish me luck and keep an eye on this thread for more updates..
Cheers,
A quote by a toilet, " use me well, keep me clean, i would never tell anybody whatever i have seen.." :PComment
-
Re: The POWERHOUSE Fz18
Hi shv 18,
Nice long post, but you should be with your hands on the bike, not the keyboard, Hahahaha!!!!
So: you should have started this last week end (well: that is what Abimanyu31 had told me was planned...) , but you most probably will not have finished after just one W.E....unless putting long hours!
I guess you have measured everything already, and have all parts matching well. A few comments on wat you are going to do, since you have described it in detail:
- Valves: you should not touch the valve seats: just a valve grinding with the new valves. Isn't it anyway a new head from Joel you have, with new valve seats???
- Camshaft bearings: you effectively have to change the inside one since you will damage it when removing it, but you should anyway change both
- Cylinder head: I guess, as said here-above, that you have a new one, all refined by Joel. I have the feeling this "race" guy likes to have a lot of compression, and does not take off enough metal form the combustion chamber. The original compression ratio is 9.5:1, with a 58mm. diameter piston which has a very small dome (=1cc from what I had measured). The volume of the stock head combustion chamber is 14cc (from Service Manual), minus 1cc dome= 13cc.. To have a compression ratio of 9.5 means that a volume of 153: 9.5= 16cc. has to be left, which means that a volume of 3cc (= 3,000 mm3) will be added by the "squish" between top of cylinder and flat area under cylinder head. The whole area of the piston is 2,200m2, so the squish, cylinder head gasket included of course, must be of 1,36mm. thick. Quite thick, actually.
Then, your new piston being of 6.29 cm. diameter, for 180cc., and if you still have the same combustion chamber= 14cc.+ 1.36mm. thick squish (= 4.2cc. with this piston), this would give you a compression ratio of 10. On top of that, while this is already high, the RC piston looks like having a much bigger compression dome than the stock one. You can then expect the compression ratio to jump up to near 11! I then find it absolutely unacceptable that Joel recommends to add up one or two gaskets under the cylinder, in order to increase the thickness of the squish and also reduce the exaggerated compression ratio. So, unless you have a head that has been reworked by Joel, and where he has taken off some metal, you should do that job, as well as a careful porting, and increase the volume of your combustion chamber in the cylinder head from 14 to 15cc. in order to have 15 + 4.2 - 2 cc (or more??) for the dome= 17.2cc, which will give you a more acceptable compression ratio of 10.5, allowing you to use 92 fuel without any knocking. This needs the nearly uniform removal of approx 1/2mm. of metal. Not difficult, but delicate, and....mind not to go too far!.
- Others: I understand that you will also have a K&N or Simota filter, stronger clutch springs, FFE, etc.... Just hope you can find another carb, and that still allows you to fit (or adapt) the TPS: changes a lot, and Joel should have provided you with such a carb.!
So: good luck, and be happy!Last edited by Lucky Luke; 04-24-2013, 12:47 PM.When I do something stupid, my consolation is to know that I'll do the worse one only once!Comment
-
Re: The POWERHOUSE Fz18
Thanks for the inputs Luke.. Yes it was supposed start last week but as it happens in all our miserable lives work came up and then we had to abandon the plan..
In this regard I will let abhimanyu31 take over to help me with the calculations and monitor the build as we progress as I feel it is best left with him overseeing it.
The new head doesnot come with valve seats. It comes ported from the RC's shop. We will see at the build stage itself if there is any additional sleeving needed.
I already have the inner camshaft bearing but the camshaft bearing mounted on the camshaft cannot be bought as a separate item. It comes prefitted onto the cam from factory. Abhimanyu31 has suggested that we will check out SKF or another good brand with matching dimensions of the cam bearing and we shall use that or else using a press we will get the old bearing out from the cam and press it back into the RC as a last resort.
Regarding the TPS the last time I had spoken to Joel, apparently the stock CDI has only one map and not multiple ignition maps so when we press the throttle it only activates or deactivates that's all. Somehow I am not totally convinced. Anyways, for now I shall follow his recommendation and then at a later part shall look forward to upgrade to a custom CDI with pre programmed maps.
Anyways lemme not blabber anymore and keep rest of talking after we finish the build.
CheersLast edited by shv18; 04-24-2013, 02:48 PM.A quote by a toilet, " use me well, keep me clean, i would never tell anybody whatever i have seen.." :PComment
-
Re: The POWERHOUSE Fz18
I was just about to send you a mail when I saw this post. We were suppose to do it last week as I had informed you. I even kept the day free and took leave from work. Shv18 leaves me hanging and does not even call till yesterday to ask if I am free this friday to do the workOriginally posted by Lucky Luke View Post . Its more than 2 months since I brought Shv18's cylinder head and carb from Joel's workshop but this guy keeps putting it off..
  Only a biker knows why a dog sticks his head out of a car window.
Multum in Parvo - Much in Little
"Yes, it is FAST! No, you CAN'T ride it!" - http://www.xbhp.com/talkies/general-...a-300-san.htmlComment
-
Re: The POWERHOUSE Fz18
Sincere apologies for not informing you earlier my friend.. but you are well aware of my recent endeavours with certain work related to travel and 4 wheels ahem!! cough cough...Originally posted by abhimanyu31 View Post anyways this Friday it is D day no doubt or else i will throw the RC parts away for good!!
As discussed earlier i have kept other essential stock parts on stand by from the SVC so if and when you feel it needs to be replaced.. it shall be replaced..
Cheers,Last edited by shv18; 04-24-2013, 01:53 PM.A quote by a toilet, " use me well, keep me clean, i would never tell anybody whatever i have seen.." :PComment
-
Re: The POWERHOUSE Fz18
What? You seriously kept abhimanyu31 hanging the last time decided for the build. Bad manners boyOriginally posted by shv18 View Post.
OK. Jokes apart, just get the bloody build done at any cost now. Although you wont have any problems with abhimanyu31 to help you there.
And I had checked the camshaft mounted bearing in SKF but couldn't find it. Or the dealer didn't check it properly, now I don't remember.
Just keep in mind to check at the main stockist for bearings.
cheers...Comment
-
Re: The POWERHOUSE Fz18
When my dad needed bearings for the cam of his re-fury, he had got fagg another very well reputed company for bearings. You can check them out too..Originally posted by N-o-v-i-c-e View PostComment
-
Re: The POWERHOUSE Fz18
Hehe... yeah i am indeed feeling bad now.. Got so caught up with work at the last moment that i completely forgot to inform abhimanyu31 about the same last weekend. Anyways shall make it upto him with a treat from my end what say?? may be some aftermarket kits for the errrr.. noble white steedOriginally posted by N-o-v-i-c-e View Post??
Yes i shall leave the decision to abhimanyu31 regarding taking the best course of action related to the camshaft bearing.
Thanks for the info.. we will see what works best with the FZ set up and then take forward the build accordingly.Originally posted by adityajohanan View Post
Just one more frekkin day i guess right now i cannot contain my excitement. n-o-v-i-c-e mate now i know what you meant by becoming impatient as the time approaches...
All the kits and the parts along with Motul 300V FS oil have been packed and ready to go!
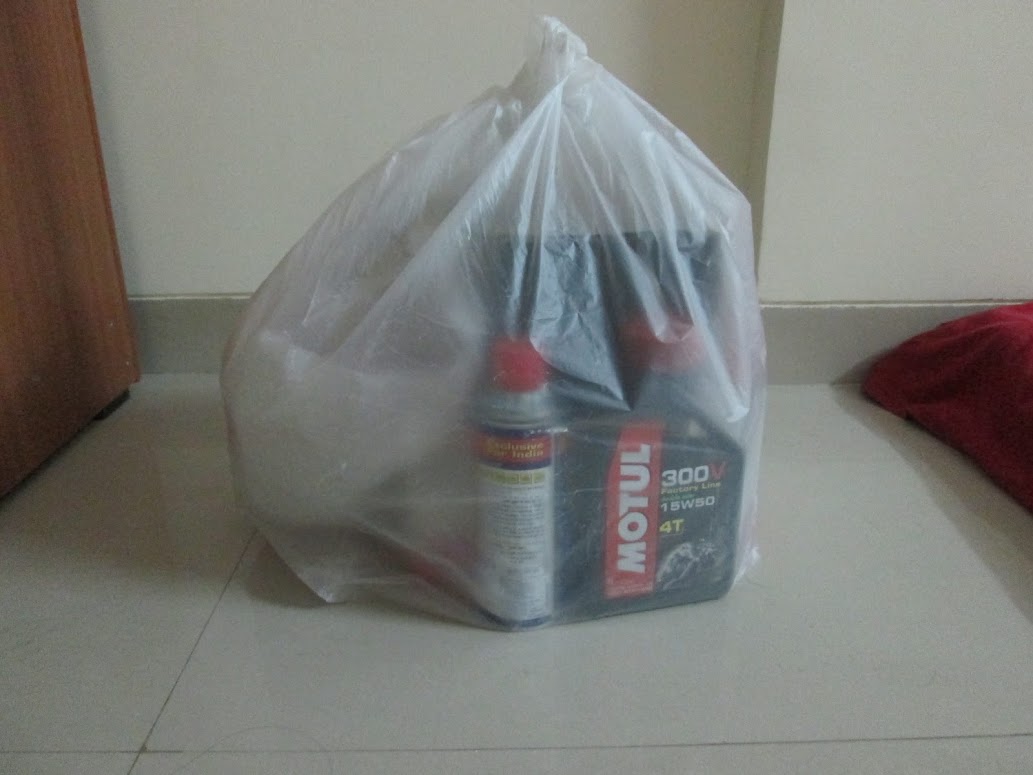
Based on abhimanyu31's recommendation, i have decided to go ahead with using Motul 300 V 15W 50 FS oil during run-in stage... currently busy staring at the wall clock, waiting for the time fast forward to Friday asap
Cheers,A quote by a toilet, " use me well, keep me clean, i would never tell anybody whatever i have seen.." :PComment
-
And the FZ - X is born
Hi all,
finally after so much blabbering and planning and spending a lot of dough, today the project of FZ-X build was completed! Many thanks to abhimanyu31 and my tech guys for finishing the build keeping all things nice slow and easy, ensuring at each stage the build stage is checked and double checked to ensure that we have the correct tolerances for everything.
So here is my story:
(P.S.: doing a quick write up, shall edit and update this post later when i find time )
As mentioned in the earlier pages and posts we had decided that during the build stage if we find any stock part that needs a replacement it will be replaced. So lemme begin the write up in sequential manner. I have requested abhimanyu31 to fill in on any pointers which i may have not understood correctly or the explanation which is not correct so that we don't do any blunder in this department. Let him handle the technical side shall we??
We first started with the dismantling of the stock cylinder block and the stock head. When everything was removed, the first thing that we did was to check the reading of the engine head and the valve to give us an idea of the story so far regarding what was happening inside the engine in this 26,000+kms of ownership.

To my surprise the valve readings and the head readings showed something else in contrast to my earlier belief!


If one notices the images here: it clearly shows the whitish formation on the valves and on the piston where the colour of carbon should be brown. Thus, it was certain that the engine was running lean. The engine had carbon build up due to usage which i believe is normal. (i shall let abhimayu31 explain better on this one.)
Regardless, one thing is certain which i would like to bring to notice to everyone.. based on the readings from the engine head, i can verify that when one does any kind of changes with the engine, it will directly affect the AFR and the way things happen inside the engine. During my brief stint with the RC FFE only as stage 1 mod i did experience a lot of power and the mileage bump too. However, the engine was running lean which is shown by the the readings of the engine head and the valves.


Thus, let me confirm that one has to do rejetting of the carburetor if one intends to use just a Free Flow exhaust or even an After market Free Flow air filter alone as a mod to compensate for the additional inflow and outflow of air and gases regardless of the claims made by after parts manufacturers and corporations. The spark plug alone doesnot give out correct reading of the health of the engine!!
First lesson learnt!
We assessed the overall condition of the factory stock old valve assembly, the stock cylinder and the stock piston to check on the wear and tear after 26,280 kms of running. All of them were found to be in good health. We then checked the condition of the crankshaft to see if there was any play or it needed to be replaced. the technician confirmed that it is in pristine condition and i should be able to have trouble free operation for many more miles.

However, lets not get there just yet.. will report more on that as i start clocking kms on this new set up.
After all the parts were verified and dismantled from the stock engine head, they were kept aside for me to carry them back (as souvenirs or as some would like to call it, safety net!!).
We then took out the new FZ engine head which was ported and then shipped to me by Race Concepts. We started prepping it for installation. First, the inlet and exhaust valves were slipped onto their respective places with grinding paste smeared onto them. This process is called Valve lapping where one intentionally starts rotating the valves into clockwise and anti clockwise motion for the time till the valves mate with the engine head properly as shown in the pic.


(I would request abhimanyu31 to do the technical explanation properly.) Once the valve lapping process was complete, we checked and rechecked the sides of the valve and the engine head to confirm that the work was done properly.
Then we started the process of installing the whole valve assembly onto the engine head as shown in the pictures below. At every step, abhimanyu31 and the technician repeatedly checked and measured to see if the parts have been installed correctly.


I got the RC mild lift camshaft and luckily the technician had already sourced out a genuine camshaft bearing from yamaha to do the deed. We replaced the original inner cam bearing and the camshaft bearing with the new stock genuine ones. After discussing with the technician and abhimanyu31, it was decided that the decompression unit will be installed, judging the tight tolerances of the 182cc kit. The reason behind this was to minimize the pressure on the engine parts and especially the starter motor, starter clutch assembly. Lucky luke has already shared his concerns with us all regarding the reduction in the longevity of the starting mechanism with the removal of the decomp assembly and the overall affects of reverse cranking to the starter mechanism.

Thus we decided it was best left being there along with the mild lift camshaft to avoid such complications at the later end.
The 182cc Rc BB cylinder and the piston along with the rings in correct order was first mounted and then the began the process of putting the piston inside the cylinder. Now folks, noobs and children of all ages! Please bear in mind that this is the most delicate and the most important process of all in getting RC kit installed. This process cannot be rushed and too much force can be applied to push in the piston unless you want piston rings to be bent and damaged which is then BYE BYE for your BB kit!
An important note: Throughout the process it was ensured that all the new parts be it the valves assembly, camshaft, bearings, etc. were lubricated properly with clean engine oil before they were installed! It is a mandatory step lest you want your engine and these parts to be void of any lubrication and get damaged in the process.


I simply cannot stress upon the paramount importance of this stage. abhimanyu31 was adamant to give the technician as much time as he wants to complete the process and i now understand the reason behind his strict order in this regard!

The technician or the mechanic has to have a know how of the kit to ensure that he patiently gets the piston instered into the BB cylinder. My technician took about a good 20 mins to get this process done. He carefully mounted it onto the cylinder first and slowly tried to ease it inside the cylinder. If there was any uneven movement, he would take it out and calmly repeat the whole process again as shown in the picture.
The technician ensured that the cylinder insides and the rings and the sides of the piston were lubed properly with engine oil before the installation was done. After the piston got inside the cylinder, we observed that the tolerances were super duper tight! so tight infact, i started having doubts with the kit whether the engine would be able to crank under such tolerances!
Once we did the installation, it observed that the markings of inlet and exhaust on the RC piston has not been done properly according to the technician. Now i am no expert in this field so i really cannot comment in this regard, however my technician felt that in the long run this will affect the life of the crankshaft. He recons that eventually under 35,000 kms we will have crank play coming into the factor and i will have to replace it when compared to the conditions with the stock piston config.
UPDATE:
abhimanyu's view:
"Here is the issue;
Most good pistons (at least the ones I have come across) have a arrow or a notch or a symbol to indicate which side is forward facing. This piston too has an arrow at the inside bottom of the piston crown. Now the question is why give such a marking when we can all see the valve recesses and know which is exhaust side and which is inlet side? The answer is 'thrust side'. In most cases, while visually the piston wrist pin may seem to be in the middle of the piston, it is actually off to the thrust side to aid in 'balancing' the force upon the piston in the bore.
In this case, while there is an arrow marking the forward side (unfortunately no photo taken) the valve recesses have been machined in wrong side. Meaning they have been flipped, where exhaust recess should be, the inlet recess is and vice versa. If the piston was assembled as per the marking, then inlet recess would be on the exhaust side, therefore, while looking at the photo though it might seem to be a normal assembly it is actually not right. What Shv18's mechanic and I were speculating was the fact that whoever machined the valve recesses, did not understand or even worst care about the marking while doing the machining."
Mind you folks that we had already taken that into consideration when i was going for this build so i am financially and mentally prepared to spend for a new crankshaft or any other parts during the course of running these kits at the event of any such thing does happen. Whether as an individual rider you are willing to spend so much, i leave it up to you!


Anyways moving on, we then got the BB cylinder with the piston mounted in to the engine bay where two cylinder gaskets were first put in the grooves and then the piston was attached to the crankshaft using the pin supplied along with the BB kit. Then the technician adjusted the cam timing chain to its correct position, alignment and tension. The old engine oil was drained and Motul 300V 15W 50 FS oil along with a new oil filter was put in. The technician carefully mounted the whole assembly and then got the cylinder placed inside the designated position. After that, using tools he slowly got the piston rolled on to TDC position or TOP DEAD CENTRE by manually hand cranking the engine slowly to the position. Again i would request abhimanyu31 to explain the technical side of it.
We then got the ported engine head along with all the valve assembly done, on top of the BB cylinder and then mounted it carefully on top of it. Now the important part: Joel recommends using 0.06mm and 0.08mm valve clearances for the inlet and the exhaust valves in order to reduce the reported camshaft noise by hot roded FZ riders.
In my case abhimanyu31 and the technician, after a discussion, decided that it was better to leave the valve clearances within the stock valve clearance limit so that, during the run-in process, the parts mate properly and the moment i cross 500 kms, we drain the oil and then check the valve clearences again. So in my case, we chose 0.10mm and 0.12mm inlet and exhaust valve clearance.

abhimanyu31 also felt that 0.06mm and 0.08mm valve clearence was too tight for the set up and will affect the overall longevity of the valves assembly. So we decided to leave it within the designated clearance limits and then finished with the installation of the engine head. The cam chain and the rest of the parts were then mounted. The technician then carefully checked and double checked everything to ensure that we didnot miss out on putting in any screw or any parts by mistake!
Simultaneously the Simota air filter was prepped after oiling it using clean engine oil and left out to drip out excess oil and then mounted inside the airbox as shown in the picture.

We then started prepping the UCAL BS29 carburetor for installation along with Pulsar 180 jet kit. To our surprise, we found out that there was a major crack on the side of the carburetor which went all the way into the venturi of the carb! We then had no choice but to leave it aside. I guess most likely the carburetor was damaged when it was purchased and it is actually quite difficult to notice unless one really pays a close attention to it.

Anyways, i have already sent a mail to Joel, Race Concepts regarding the matter. I will be shipping this carburetor back to Race Concepts and have requested Joel to assist me in sourcing the carburetor from here in Mumbai itself so that we avoid any such blunder due to manufacturing defect or shipping error which seems to be quite common in India. I am sure he would be prompt and supportive in this regard.
We had no choice but to use the stock BS 26 carburetor for the time being to get the installation done with! We chose Jets: 115 main jet, pilot jet from Pulsar 180 kit and stock needle jet as a first base to see which jets will provide base map to atleast finish the run-in. My stock bike was giving problems with the engine not responding to throttle when the revs go below 3,000 rpm.
It was discovered that the carburetor valve had gone kaput which was replaced and then with everything mounted, we got the stock BS 26 carburetor installed. We had also got the air induction system replaced which was found to be faulty.


The petrol tank was cleaned and then installed right back on the bike. As of now it is expected that the fuelling will not be precise as the base map set is just to ensure that i get the run-in finished. After the run-in is complete we will move into the tuning part to see which rpms i witness flat spots with the stock BS 26 carburetor, till i can manage to procure the BS 29 carb. Till that time we will play around with jetting on the stock carb.
We then moved our attention to the clutch assembly to see what was the condition of the stock clutch system. After dismantling it was found that there were significant scratches on the pressure plates though the technician said, they will last for another 10, 000 kms without any glitch, after discussing with abhimanyu31, we decided to install new ones to ensure that with the add on power we don't have any clutch failures due to usage fatigue. Thus, the old clutch plates and pressure plates were removed and the new ones were installed along with the racing clutch springs. Everything else was checked and found to be in perfect condition.


After all fuel lines, electrical connections were made, we kept the top lid of the engine head opened and then started the engine to see whether all the valve, cam chain, valve rockers were functioning properly, and whether the engine oil was reaching the top head to lubricate these parts.

It took just two cranks to bring the engine to life. We kept the engine idling for a good 10 mins to check and double check if everything was in order and the carburetor was tuned to get the idling set right. We then slowly revved the engine to about 4000 rpm to see if there were any flat spots and any unusual noise coming from the engine.. After the technician and abhimanyu31 were fully satisfied, we then got the top lid mounted and then got the Air induction pipe connected.
Now an interesting observation: With all parts new, Valve assembly, new head, including the camshaft bearings, the so called "stitching noise" as reported by a lot of riders was surprisingly minimal!! Yes it was there, but when i compare it to stock it was just say about 60% more and that's about it! And lets not forget i still have to finish my run-in and then do valve clearances checked and tightened.. so lets see how much reduction happens with the "stitching noise" as i clock more kms!
Anyways, once everything was prepped and finished, it was time for footing the bill: the total damage was RS. 4370 bucks!! This doesnot include the cost of the other stock parts which were sourced!
I started the bike and then left from the workshop along with abhimanyu31. As per his advice, i shall follow the run-in method as mentioned on the first page of the thread. The revs shall be kept in check for the first 500 kms under 4000 rpm.
After 500 kms, i shall drain the oil and refill her with Motul 300V FS oil and replace the oil filter as well as then shall slowly start opening her up. As an add on precaution, under no circumstances i will entertain a pilion rider or saddle bags or any kind of extra weight for atleast first 200 kms to ensure that no extra stress comes on the engine and also for the first 200 kms, every 30-50 kms the bike shall be switched off for atleast 15- 20 mins to cool down.
Initial observations, i can say that the engine is heating up quite a lot which i guess is to be expected due to such tight tolerances! At time i will also crank her at the parking lot and leave her idle for 10 mins and then just switch off to ensure that the parts are grinding against each other with adequate cooling from ambient wind in and around my house ofcourse, it gets the necessary running from it.
The engine does take time to crank without applying throttle. However, a slight dab of throttle and she comes to life with a steady rpm. But at time i am hearing a clunking noise from the engine.. though not reverse crank for sure but some kind of metal noise. Anyways, It is too early at this stage to comment about anything as i have just completed 17 kms total since the build.
More reports later.. this is just a brief blabbering for the moment.
Cheers,A quote by a toilet, " use me well, keep me clean, i would never tell anybody whatever i have seen.." :PComment
-
Re: The POWERHOUSE Fz18
^^Beautiful write up Shv. Got nostalgic reading your post
Running in with fs oil was a good decision given the super tight tolerances. I took same route and have absolutely no problems whatsoever.
Finally u got the bike "Joelled".
Sent from my iPhone using TapatalkLast edited by rylan; 04-26-2013, 10:12 PM.Comment
-
Re: And the FZ - X is born
Finally you finished of the Build.Originally posted by shv18 View Post
Now after going through your post I made up my mind for the Ported head and a complete new valve assembly considering my rocker arms have started to show unnecessary play @ 37K on the Odo.
Do keep us updateCOLOUR ME CARZY CUSTOMS
http://www.facebook.com/CMCCustoms?fref=ts
Yamaha Fz-S Ft Race Concepts
http://www.xbhp.com/talkies/general-...aked-bull.htmlComment
-
Re: And the FZ - X is born
@ shv..is it just me or no one can see the pics?
I badly wants to see them!"Vibes transmitted from crank shaft to frame, then through the bearings of the head stock and into the stem where it meets the triple clamp and into the clip-ons where it is greeted with great pleasure by my hands"-ratfighter mod rtrComment
-
Re: And the FZ - X is born
The pics can be viewed just fine mateOriginally posted by albyjose View Post
Sent from my iPhone using TapatalkComment
-
Re: And the FZ - X is born
@shv18 : You missed writing the most important part! How does it feel to ride?? I know the tune is not perfect and you cant cross 4k rpm but still low end bump in power/torque should be evident Anyways a very informative write up, wish i could have been with my bike when it was undergoing the transplant
Happy riding, wish you many more miles with the transformed FZ!Comment


Comment