


 Tweet
Tweet
Indicators timing, frequency setup
I'm very eager to start an experiment on the indicators of my black Karizma R (bought on 30 Nov, 2010)
1. The fact is that I prefer to use light signals over horns (specially on highways) for overtaking, giving pass etc, and everytime I change my lane I use indicator.
Now, since beginning I've found the timing of the indicators quite wrong in my bike...meaning that the moment I switch right indicator(say, for example) then there is a delay(of the order of 1 second) then it glows then off then glows and so on...and the glowing time is too short. However, in my brother's Karizma R 2011 the indicators glow as soon as we turn the switch and the frequency is also greater(please compare both). I don't want that either 'cause the frequency is too much in the new model. I want a decent timing(like in most of the cars), can I adjust the timing by doing some kinda experiment with the circuit? Or is there any other method to do so?
2. Also, I wanted to do a Hazard lights/Parking lights setup(all 4 indicators glowing at the same time) on my own and before that I think switching to LED indicators would be benificial as they will consume lesser power and I can use them for short breaks on any road at night for 5-10 minutes with engine off also without worrying about the battery consumption. So, please guide me regarding this...
Thanks
 Thanks sir
")
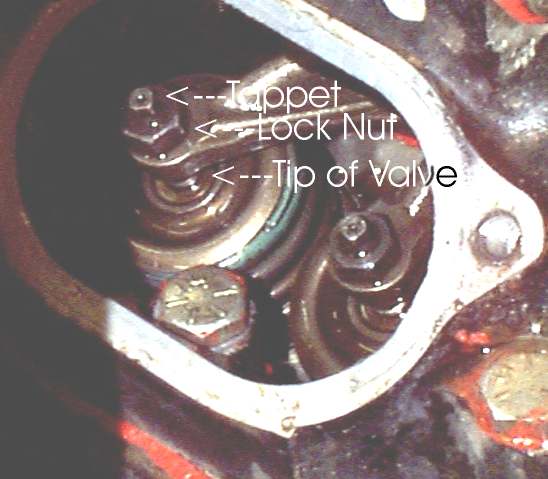


 never knew it was this complex to do. At the SVC the mech removed the tank opened the engine head inspected through the hole took a tool( dont know what
  .( 10 min max)
 .
.


Comment